I’m happy to report I’ve crossed another to-do item off my list for my friends’ sons’ bedroom and will be heading over Friday to start installing some of the pieces!
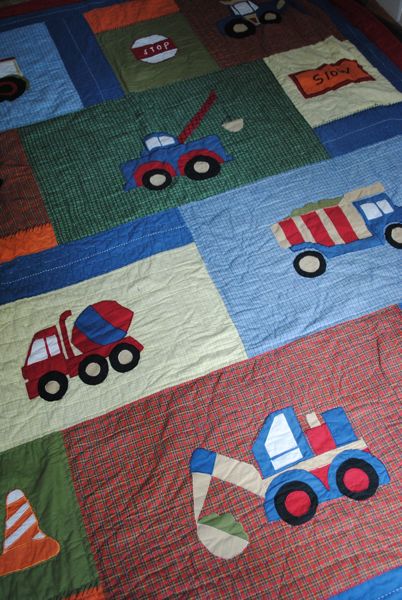
The quilts that were on the boys’ twin beds before didn’t complement each other very well – one quilt was a cartoonish Thomas the Train motif in lime green and turquoise while the other was a much more rustic looking quilt with muted red, navy, and light blue colors.
Karen agreed to get new matching quilts for the beds and we settled on this simple navy one.

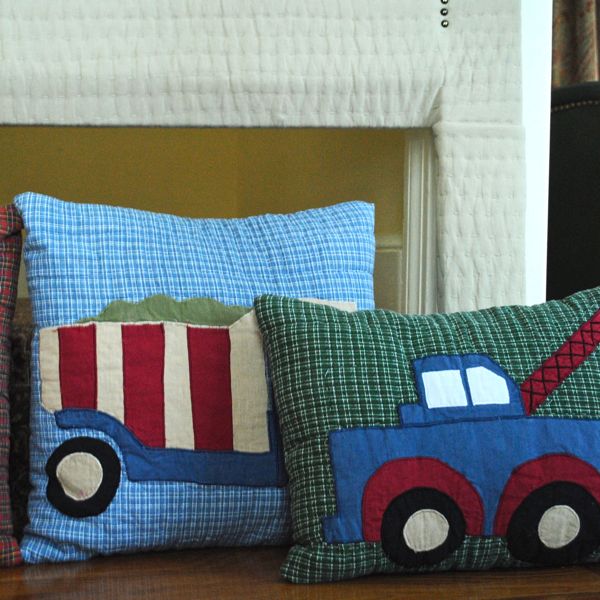
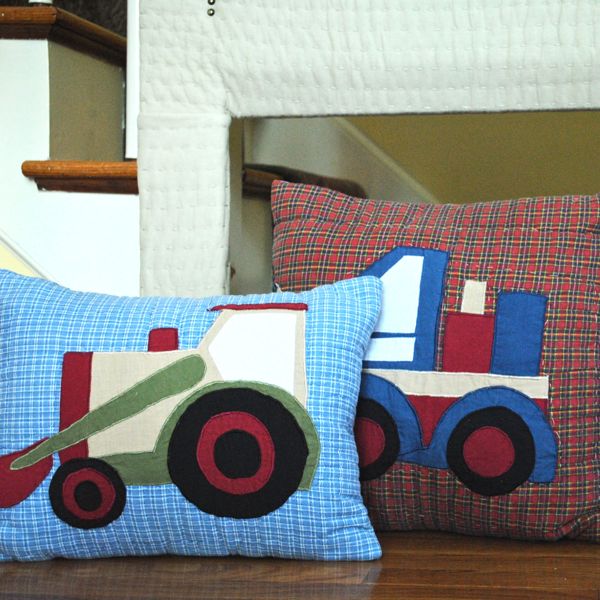
I liked the idea of keeping the color classic and solid so the quilts could stay with the boys as they grow older. I also planned to take the old quilt with red, navy, and light blue and use it to make a few throw pillows for their beds. There was some of the soft khaki that’s in the headboards and so everything would tie together really nicely.
I used the same envelope closure technique I’ve used many times before. One slight difference in the way I cut my fabric here came about because I wanted the pictures of the trucks to be centered on the finished pillow. The way I ensured this would happen was to take my fabric length measurement – in this case 40″ – and subtract 4 from it, bringing me to 36″. I eyeballed the center of the picture on the quilt, measured 18″ (half of the 36″) to one side and marked my edge, then measured 18″ in the other direction, added that extra 4″ back on to that one side, and marked the 22″ on that side. See the diagram below for a visual.
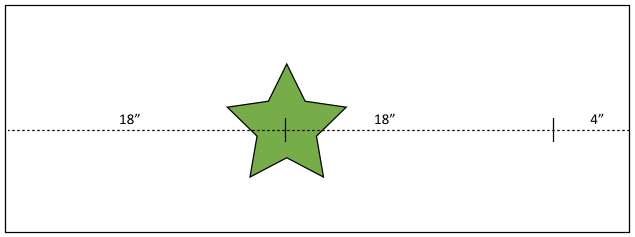
If you follow my instructions for the envelope closure pillow, just be sure that when ironing your folds for the back closure that you fold the longer side from the side of your fabric where you put the extra 4″. When you finish sewing and flip your pillow cover inside out, you should have a perfectly centered image.
make growth chart
make throw pillows from old quilt
make upholstered headboards
And just a reminder where things stand as far as my DIY to-do list for the room:
spray paint picture frames
refinish side table
reupholster piano bench
I’m so excited to start setting things up!


