Okay, I’m back!…still with a scratchy throat and runny nose but I powered through yesterday, got some work done on the final updates to our home office built-ins, and worked on an upholstered bedframe I’m making for a friend.
And today, as promised, here is the tutorial for the bench I made for my friend’s dining/living room!
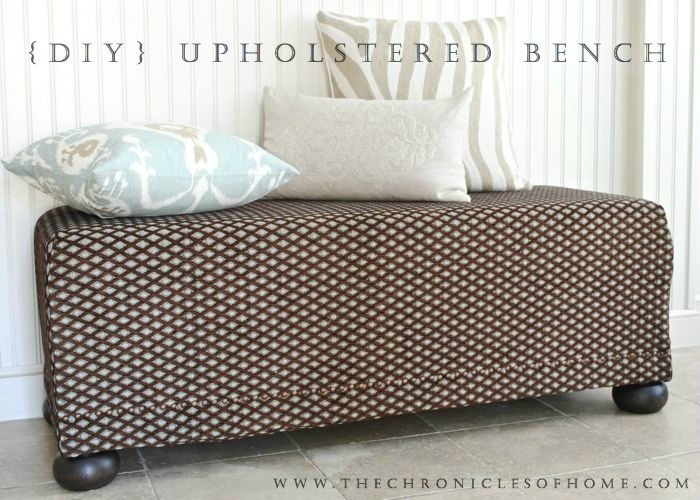
It’s the same size and shape as the upholstered bench I built for my kitchen last April, which I made by constructing a large box out of plywood sheets, which weigh a TON. For this one, I used a plywood sheet for the top but built the rest of the frame out of poplar boards, which are harder and stronger than pine, but still not too expensive (you’d never want to use oak or cedar for a furniture frame that’s going to be covered up by upholstery!).
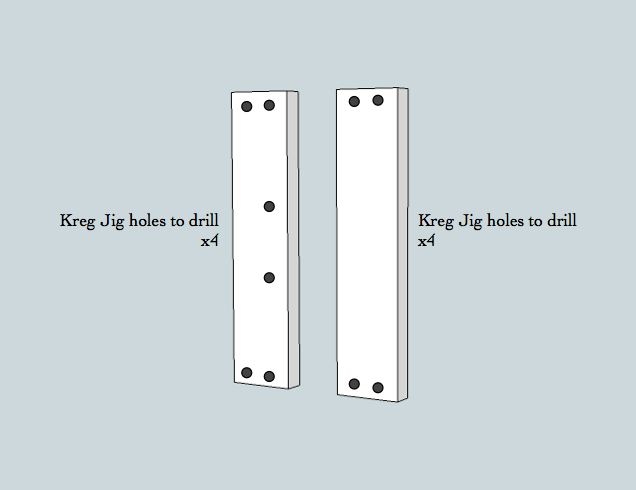
I used a miter saw to make all of the cuts on the poplar boards. I also used a Kreg Jig to drill the holes for attaching the boards, which helps create extra-strong joints by placing the pilot holes at just the right angle and allowing for countersunk screws.
Here’s what you’ll need to buy to build the frame the way I did:
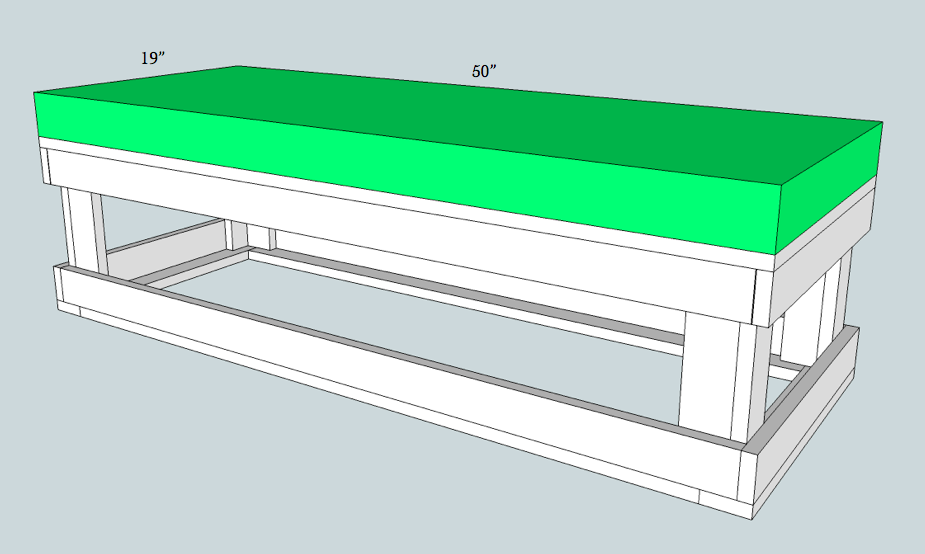
- 1 piece of plywood cut to 19″x50″ (you can have this done at Lowes or Home Depot)
- 6 – 1x3x8 poplar boards (actual dimensions of boards will be 3/4″ thick, 2 1/2″ wide, 8′ feet long)
- Kreg Jig
- 1″ wood screws (my favorite are the brass cabinet screws from Ace Hardware)
- 1 1/4″ wood screws
- 1 piece of 3″ thick high density foam, cut to 19″x50″
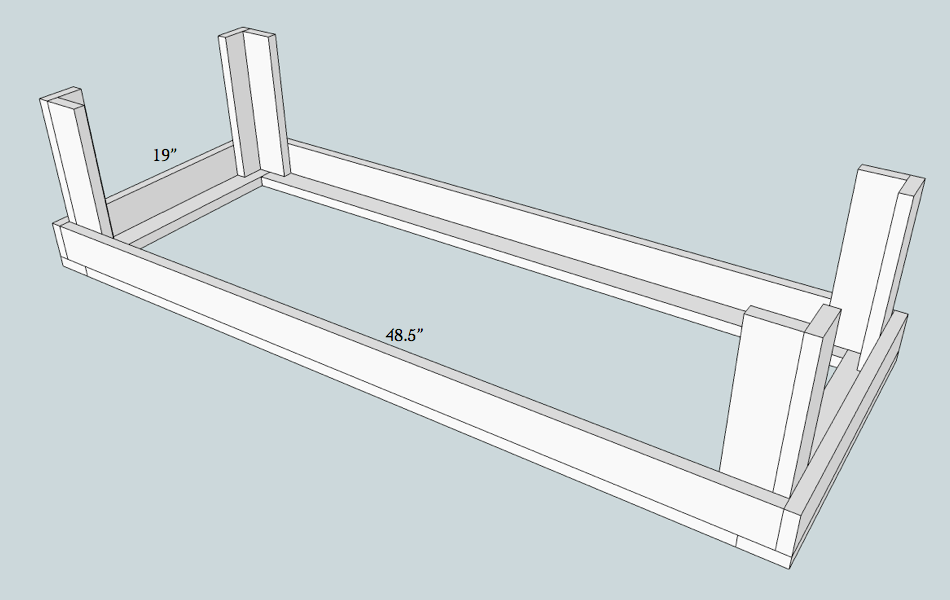
Cut the poplar boards to the following lengths:
- 8 – 11″ boards
- 2 – 45″ boards
- 6 – 19″ boards
- 4 – 48 1/2″ boards
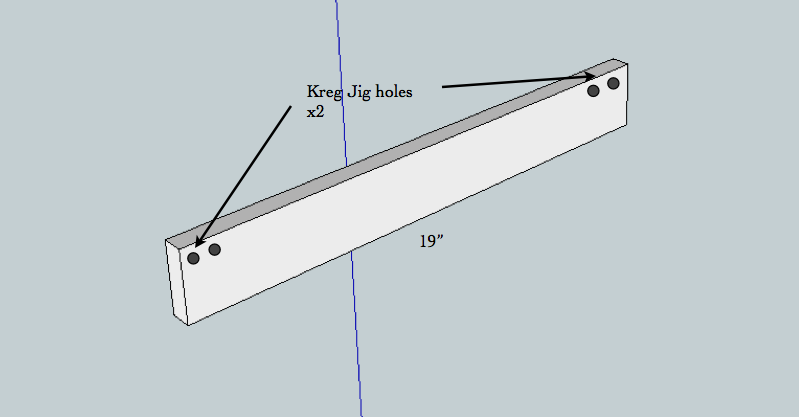
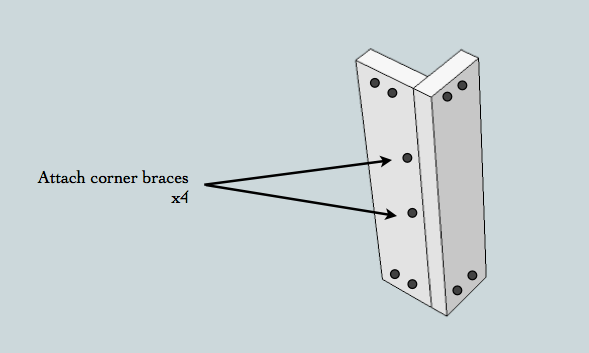
Use the Kreg Jig to drill holes in each of the 11″ poplar pieces and in two of the 19″ pieces as shown in the diagrams below.
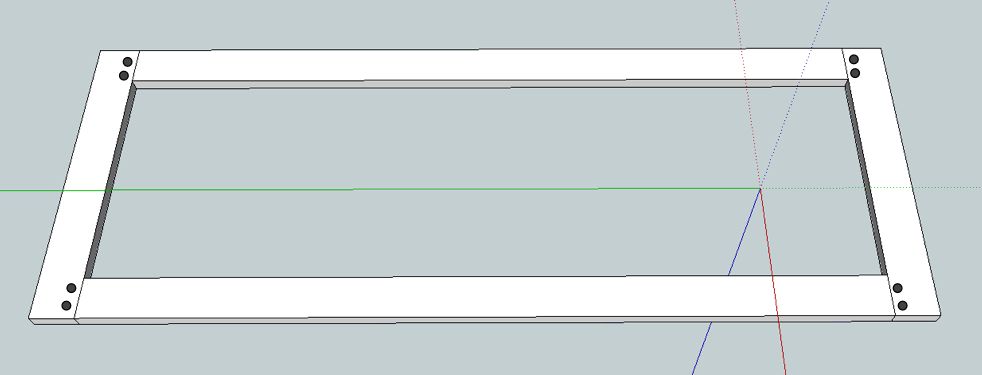
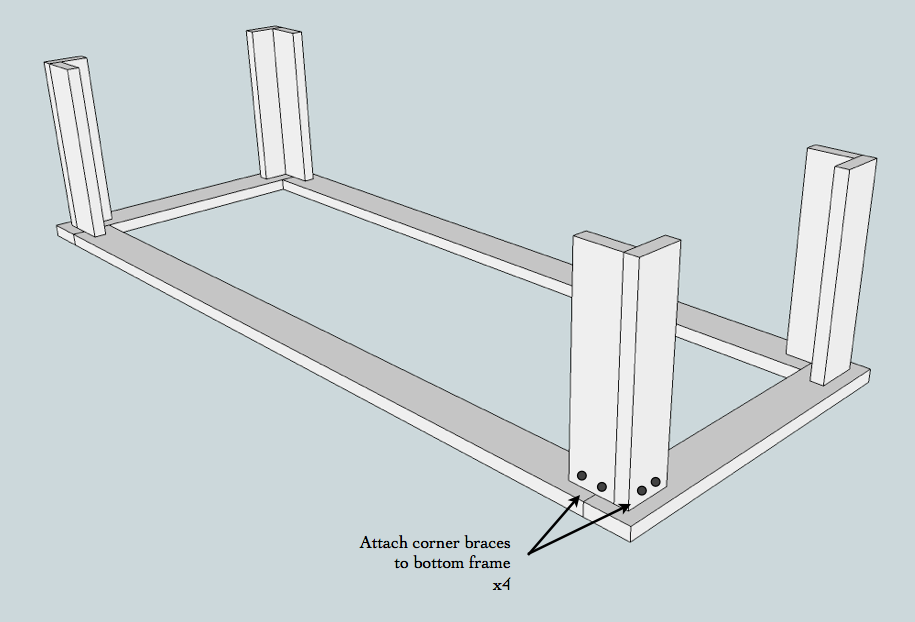
Use 1 1/4″ wood screws to attach two of the 19″ poplar pieces and 2 of the 48 1/2″ pieces to the bottom of the frame as shown. Drill screws straight through the sides of the pieces and into the corner braces, one or two screws at each corner.
Lay the plywood on the floor and measure and mark 3/4″ in from each corner. Invert the frame you’ve built so far on top, lining the corner braces up with the 3/4″ marks you made. Drive 1″ wood screws through the remaining Kreg Jig holes at each corner to attach the frame to the plywood.
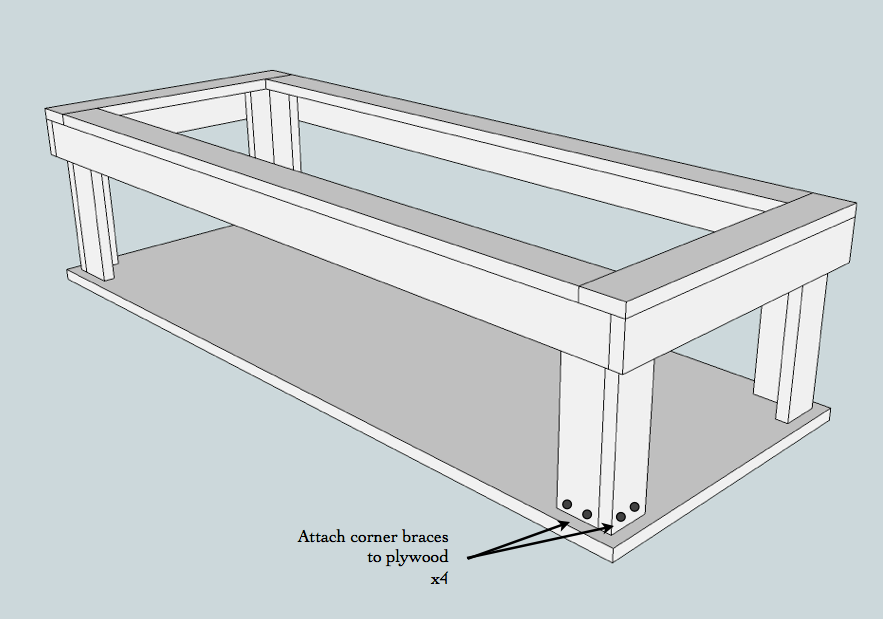
Attach the remaining two 19″ pieces and the remaining two 48 1/2″ pieces underneath the plywood the same way you attached the other 19″ and 48 1/2″ boards, with one or two screws at each corner through the boards and into the corner braces.
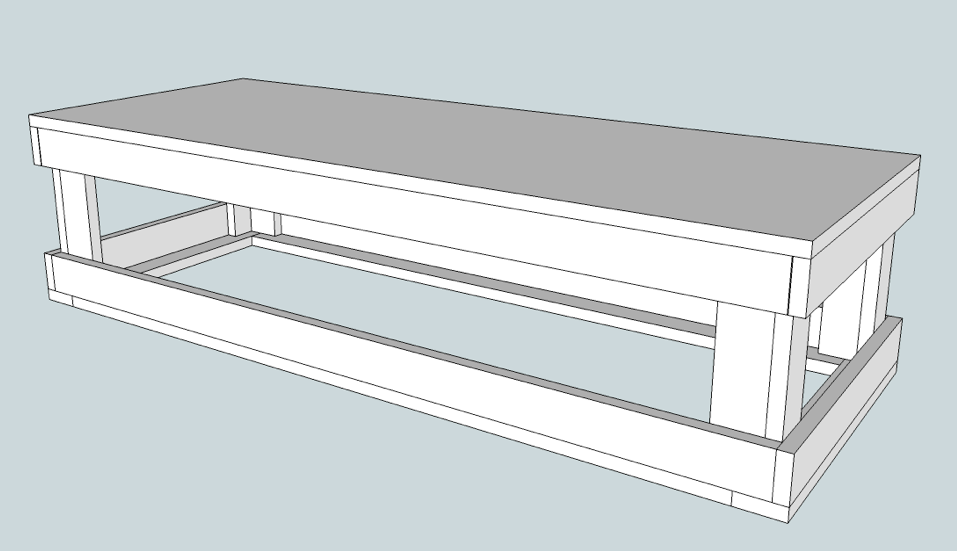
Give the plywood a light coat of spray adhesive, carefully align the foam on top, and press down to adhere.


this is so cute thank you for the DIY! But I think if I’m going to build one I might just add a shelf to the bottom and upholster the top this way I can store kids art supplies in cute little bins
Great idea!