I love to build things and I love a project so, naturally, combining the two is a super lovefest. My great-grandfather was an upholsterer and sometimes I think this fondness for building things with my hands must be in my blood. He made some absolutely gorgeous pieces – the tufted back, green damask couch he made for my parents as a wedding gift in 1973, and which still sits proudly in their living room, is the most gorgeous piece of furniture I have ever laid eyes on. At this point I can only dream of being able to make something so exquisite. But here goes my first shot at an “upholstered” piece of furniture.
I’ve wanted a little upholstered bench in our kitchen for awhile now. Somewhere for friends to perch with their glasses of wine while we’re in the kitchen together. A couple months ago I saw the Essex Bench from West Elm and it was just right…except I didn’t want to pony up the $400 (there are delivery and delivery surcharge fees) to get it.
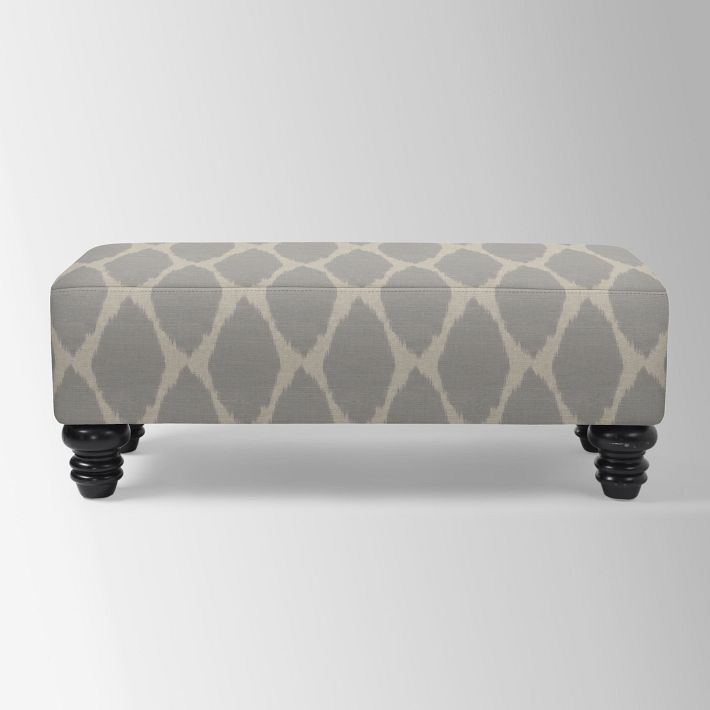
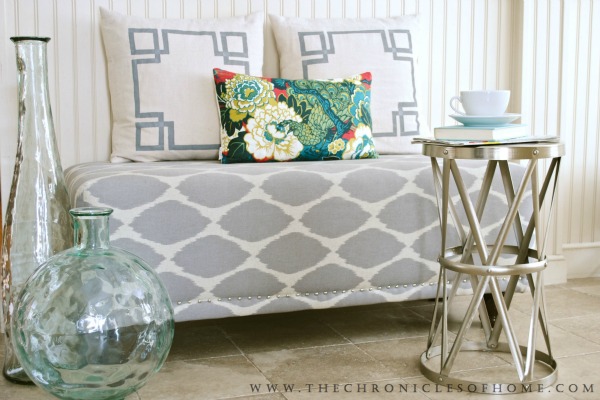
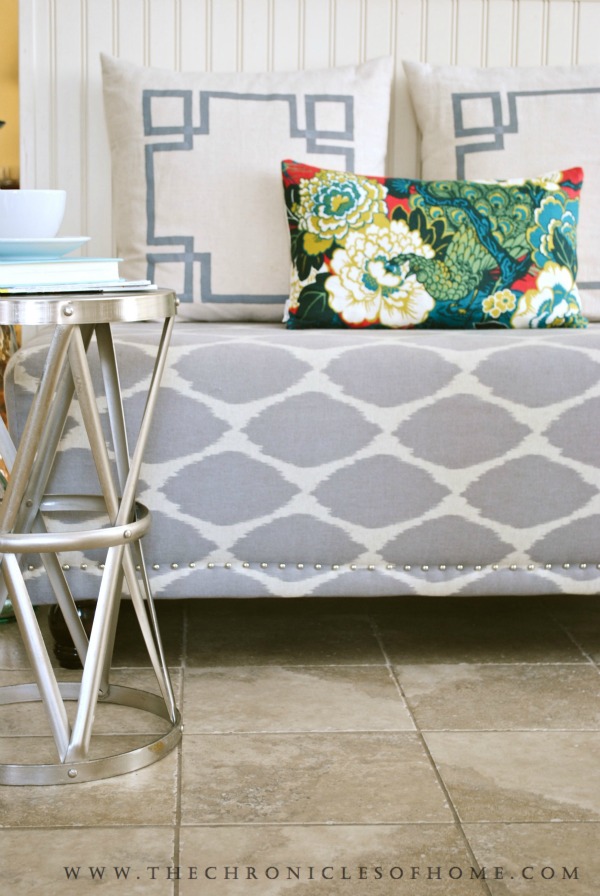
Plus, I wanted to try my hand at this kind of thing anyway. They offer it in this abstract ikat fabric I loved…which, lucky for me, I could buy by the yard (and big bonus, I could cash in credit card points for a $50 West Elm gift card). So I set out to replicate the bench for myself, at a fraction of the cost, and I am pretty darn thrilled with the results. The only significant change I made was adding some silver nailhead trim around the bottom of the bench. Now I just need to figure out how to keep sticky toddler fingers far, far away from my masterpiece…
If you’re inspired to give it a shot yourself, read on for step-by-step instructions and photos. This will give you a finished bench that measures approximately 48″W, 18″H, and 19″D. It may look like a lot of work, and while not quite a leisurely afternoon project, I promise you the whole thing took me no more than 5-6 hours total.
***For an updated building plan with step-by-step diagrams, click here!***
You will need:
6 pieces of 3/4″ plywood (Lowes or Home Depot should be able to cut these pieces for you)
- 2 – 19″ x 48″
- 2 – 9.25″ x 48″
- 2 – 9.25 x 17.5″
Wood screws
3″-thick piece of foam, cut to 19″ x 48″
cotton batting, 48″ x 84″
staple gun and staples
54″ wide fabric for cover – 3 yards
muslin, felt, foam, or other utility fabric for the bottom of the bench, 16″ x 45″
straight pins
thread to match fabric
wooden bun feet, 4″ high (doesn’t have to be exact, just something close to this)
metal mounting plates
wood stain
polyurethane
150 upholstery nails
Screw plywood pieces together to make a rectangular box. Drilling pilot holes with a drill will make this much easier.


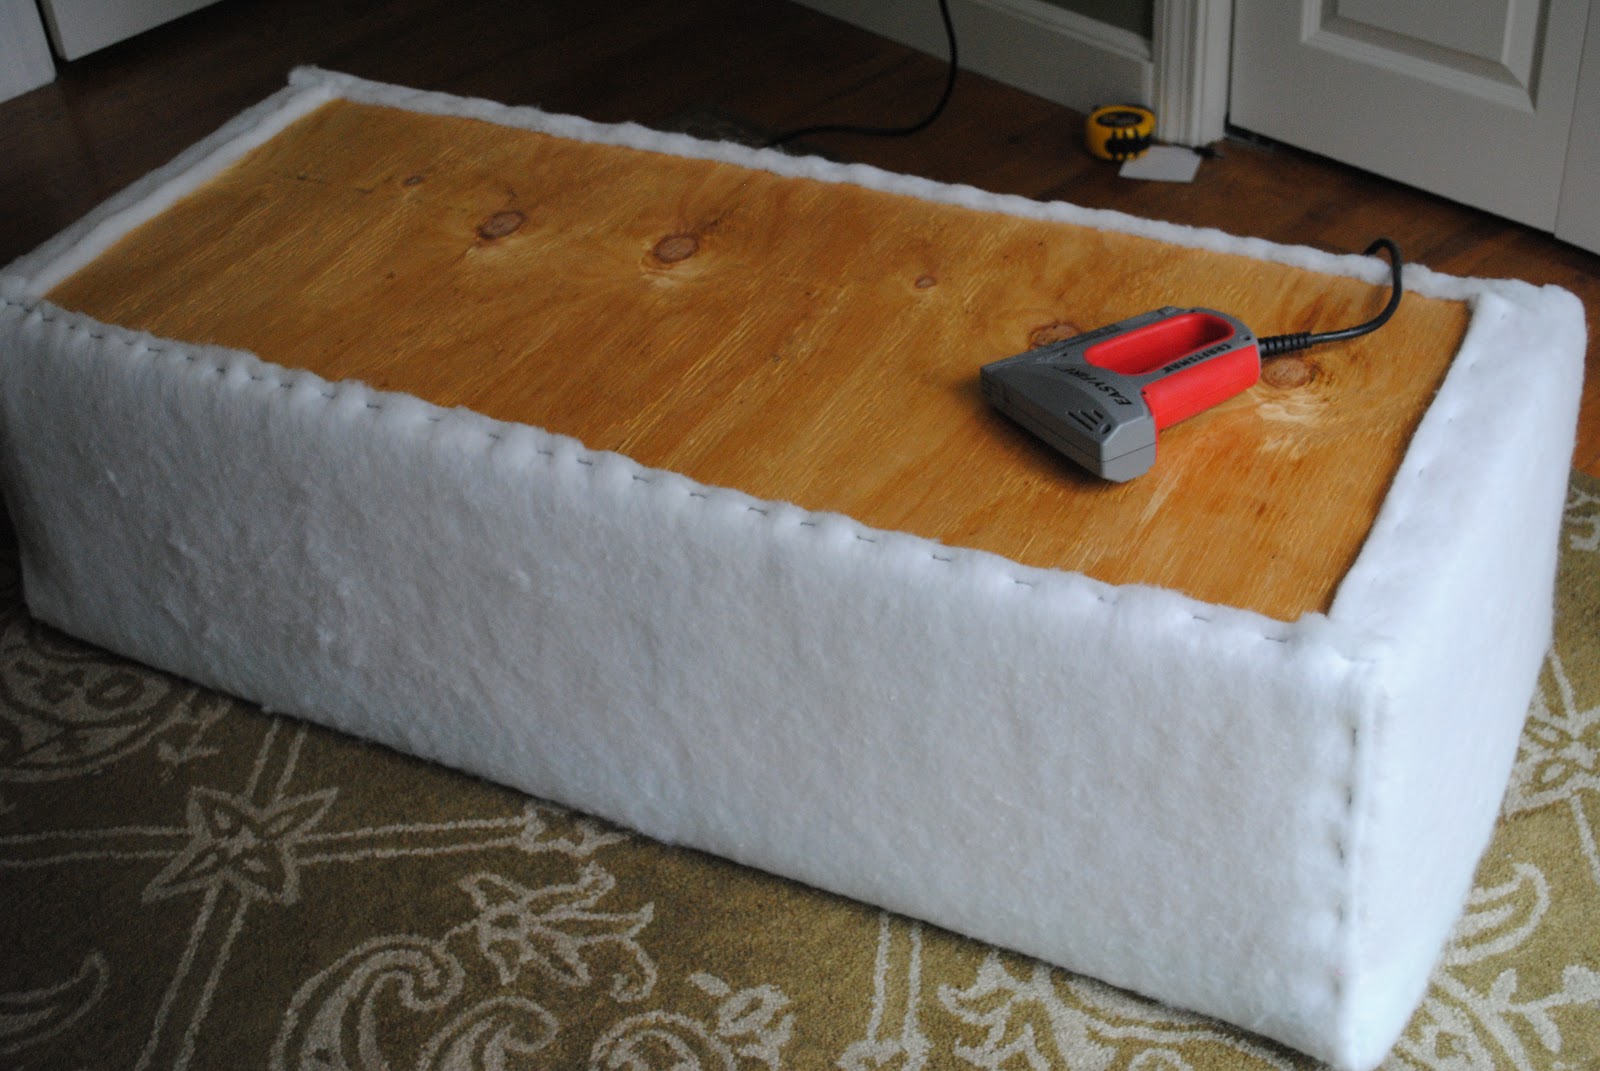
Lay the batting on the floor and center the foam on it. Place the plywood box on top of the foam.

Pull the batting tight around the box and using a staple gun, staple the batting to the box. As you get to the corners, trim the batting to leave approximately 2″ of overhang. You will cut a rough square of batting off each corner.

Wrap the batting at the corners as you would a present, tucking and folding to make corners as neat and flat as possible. Then staple the up the side edge of the box.


When all stapling is finished, you should have something like this:
Turn the box over so the finished side is facing up. Drape your chosen fabric over the box inside out. If your fabric is patterned, you’ll want to pay attention to centering it over the top. Leave several inches of extra fabric on each side, so you will have some fabric to pull and staple underneath. trim any excess. Smoothing and pulling the fabric taut, pin the fabric at each corner to make a snug slipcover. The pinning should angle in slightly at the top of each corner in order for the cover to fit properly when finished.

Carefully pull the cover off the box and, using a sewing machine, sew along the pin lines. Remove pins and flip cover right side out. Pull the cover over the box with the right side facing out this time. You should have a snug-fitting cover with extra fabric at the bottom. Make sure the corner seams are aligned well with each corner of the box. Flip the box over so the bottom is facing up. Pulling the fabric very taut, fold the corners as you would a present and staple along edges and corners to secure fabric to the box.

Center the muslin, felt, or foam on the underside of the box to cover the bare wood and fabric edges, and staple to the box.

Stain the wooden bun feet with wood stain. Dry as directed and topcoat with polyurethane, again allowing to dry as directed.

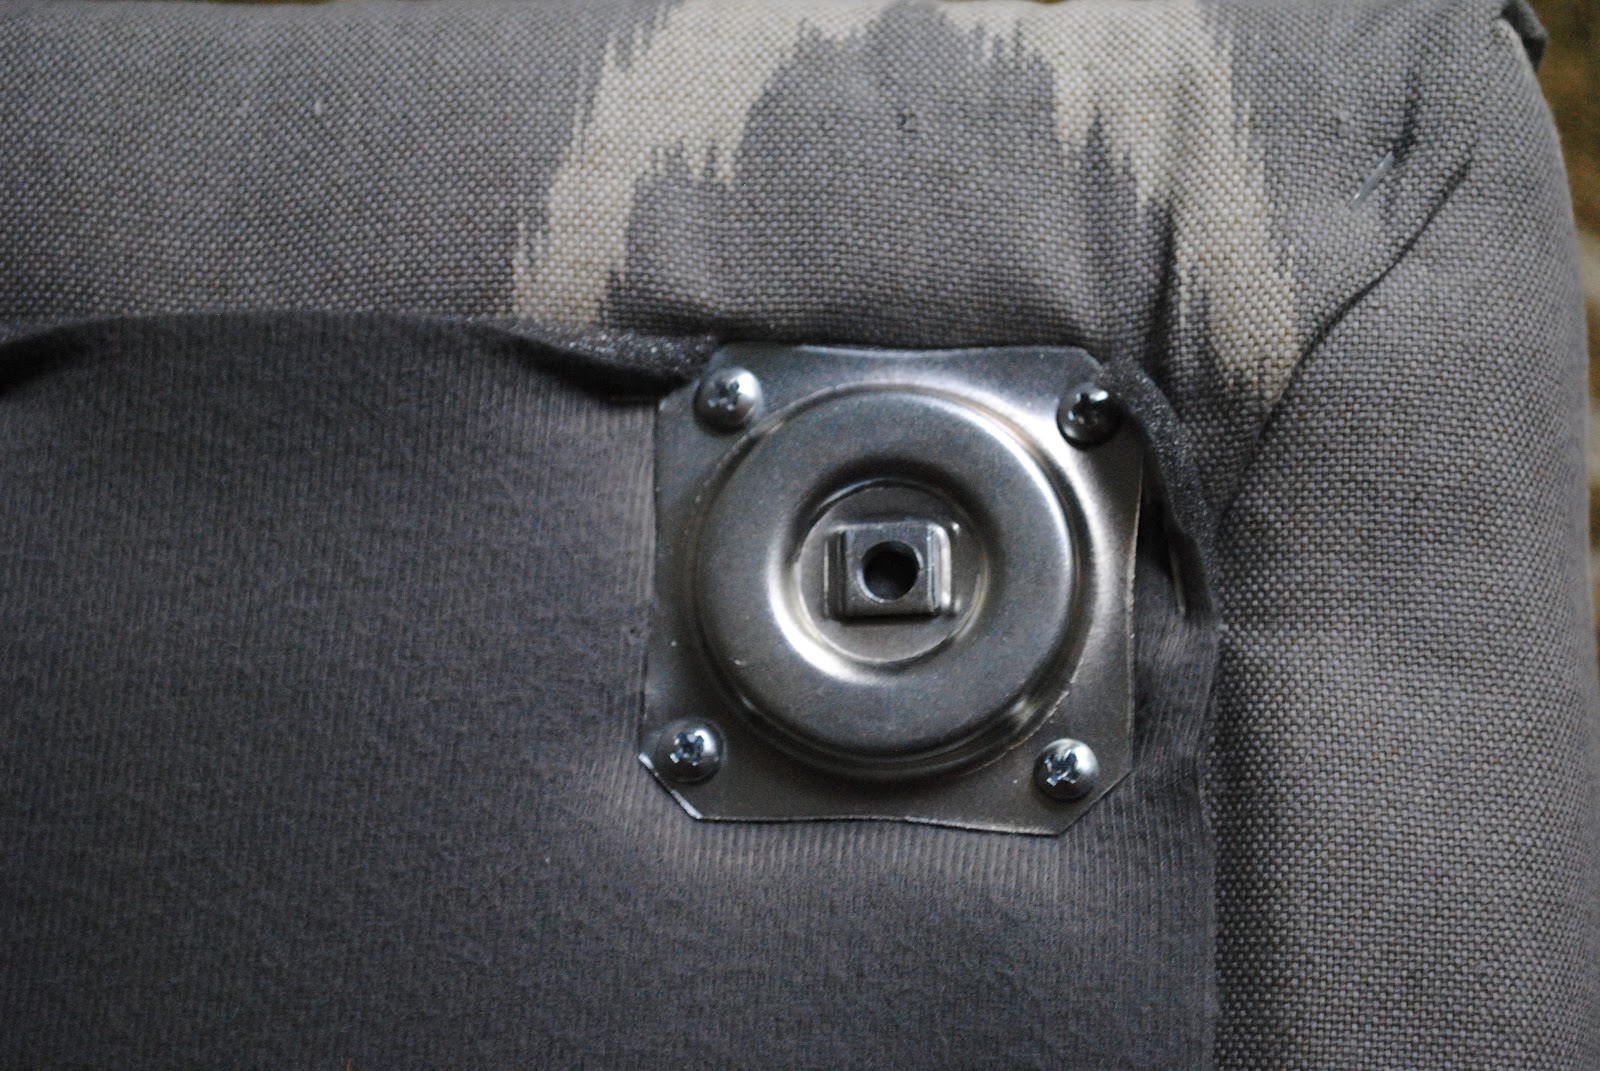
Attach the metal mounting plates to each corner of the bottom, 2″ in from each side.
Working your way around the box, mark dots at 1″ intervals, about 1.5″ up from the bottom.
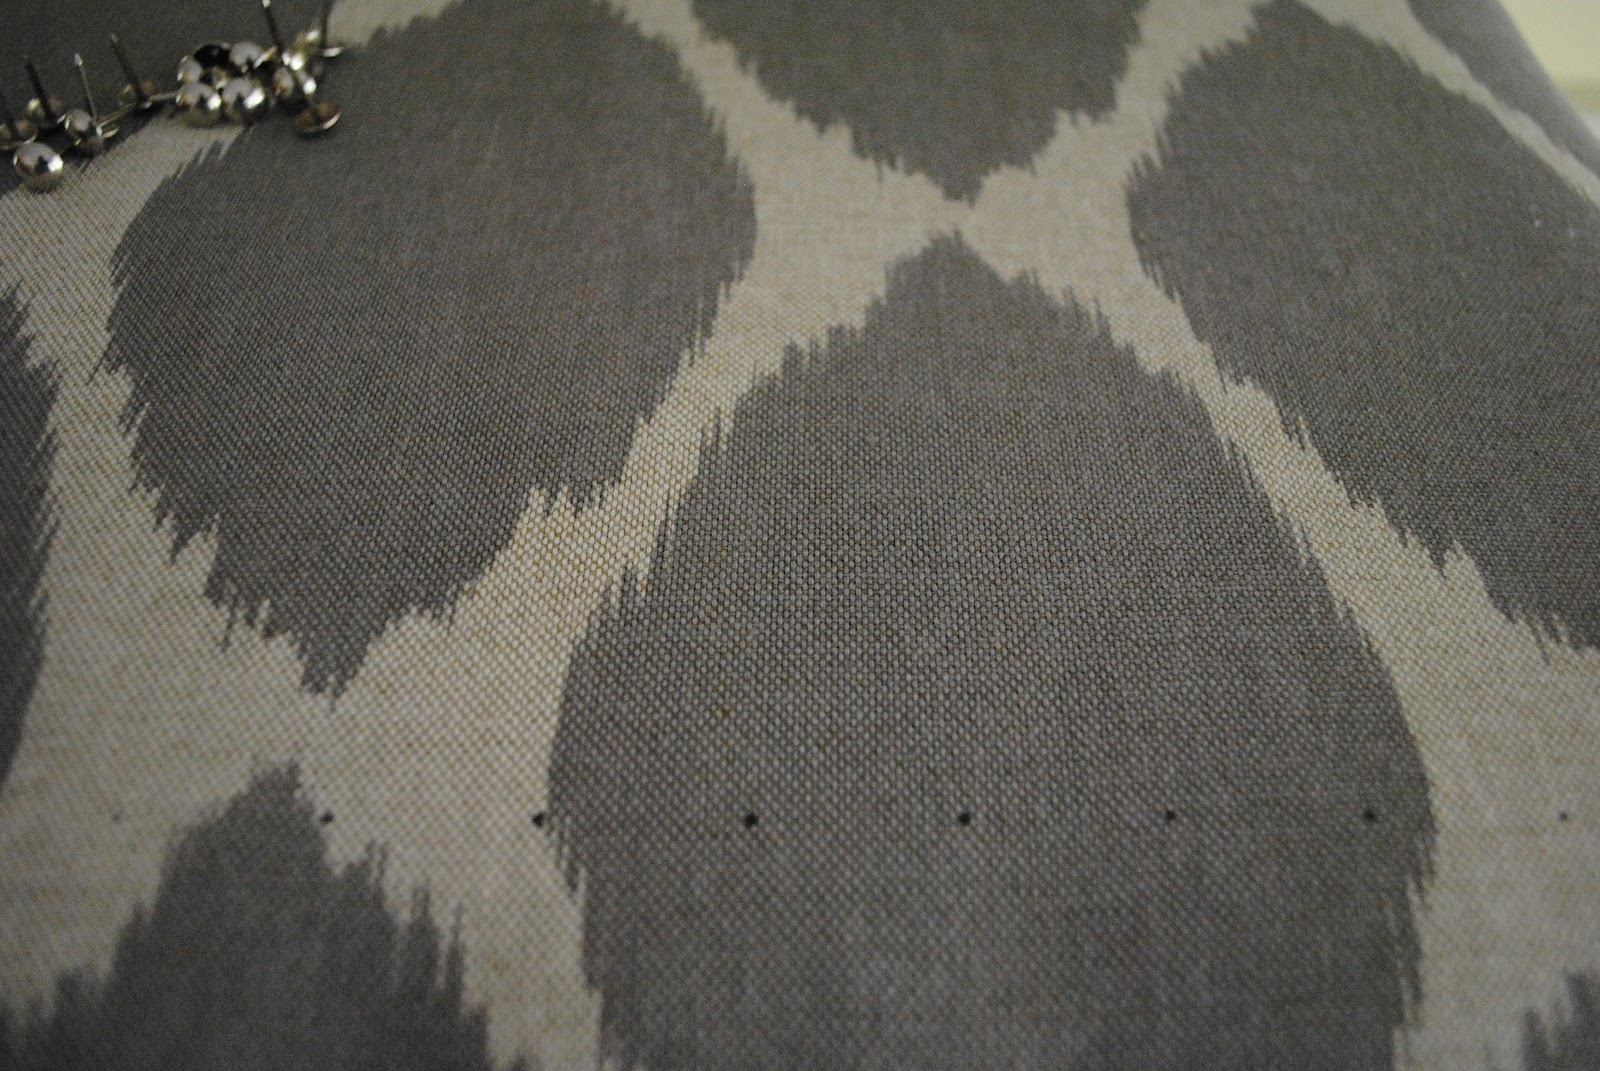
Hammer the upholstery nails in on top of each marked dot. Screw in the dry legs (make sure they are fully dry), flip over, and, baby, you’ve got yourself a bench!
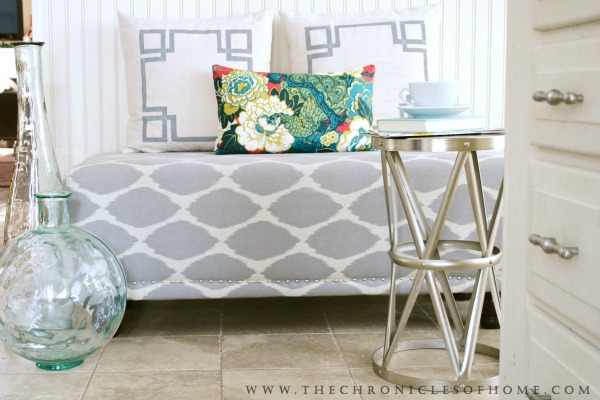
For instructions on how to make the Greek key accent pillows pictured, click here!


Bubbles, I’m so impressed! I’d heard you were handy so I’m excited to see all your fun projects. Maybe you can inspire me :)
Do you have a cost estimate for this DIY?
I’d say it was probably between $120 and $135. I did have a $50 gift card that I used toward the fabric and I also used a 50% off coupon to save on the foam, which can be kind of expensive. I already had the wood screws and staples so these aren’t included in that cost.
Ok. Thank you!
This comment has been removed by the author.
love this, jennifer! the fabric is gorgeous and the nailhead trim is awesome!
Fantastic piece, very well done!! especially for your first piece…I think upholstery is definitely in your blood ;) We’ve made a few Ottomans – my husband builds and I upholster – and we learn more each time we do one! we make ours very similar to yours except a frame goes under the plywood and i put (thin) foam on each side. i’m thinking maybe i don’t need to do that anymore after seeing yours without :)
Wow! This is so gorgeous!!! Great work!
I love this, would love to make a bench with storage one day! Love the fabric you chose.
where did you get the peacock pillow from? love the fabric on that too!
Hi Jackie – there a link to the source I used here: https://www.thechroniclesofhome.com/2012/11/shanghai-peacock.html. The fabric is by Schumacher and is called Shanghai Peacock.
THANK YOU!!! This is the first time I’ve been to your blog (and I marked it a favorite – fyi). I looked around thinking you had it noted somewhere in here, but I guess I didn’t look hard enough. Love what you’ve done in the space. I still have to poke around on here to see what other great things you’ve done! Thanks again!
So glad to have you here, Jackie!
I would be totally interested in how much this cost to make. I SO desperately want something like this for our master bedroom for the end of the bed! This is the perfect tutorial! Just wondering how much the supplies cost and the kind of wood you used! Thanks!
I just used plywood, which is typically pretty inexpensive. The foam for the top can be pricey, but better if you use a coupon (Joann’s usually has them). I don’t know the exact cost but it was way cheaper than retail!