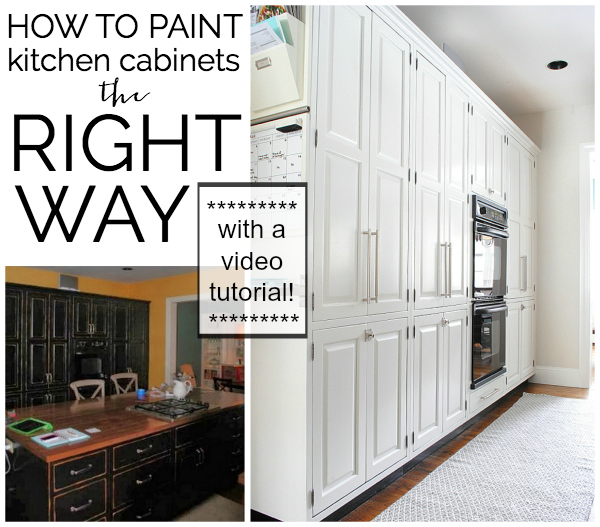
Ahhhh…painting kitchen cabinets. At once my favorite and most detested household project. This is now the third time I have painted our kitchen cabinets.
You read that right.
Not here in my current house, mind you. I first took the project on many years ago now, when Scott and I bought our first house. I didn’t really know what I was doing and they came out pretty well but after several years were showing signs of wear. So I painted them again shortly before we moved.
I knew pretty early on that I was going to paint the cabinets in our current house, where we’ve been living now for a little over a year. The cabinets were excellent quality but the black, while kind of interesting and striking, sucked all the light out of the kitchen.
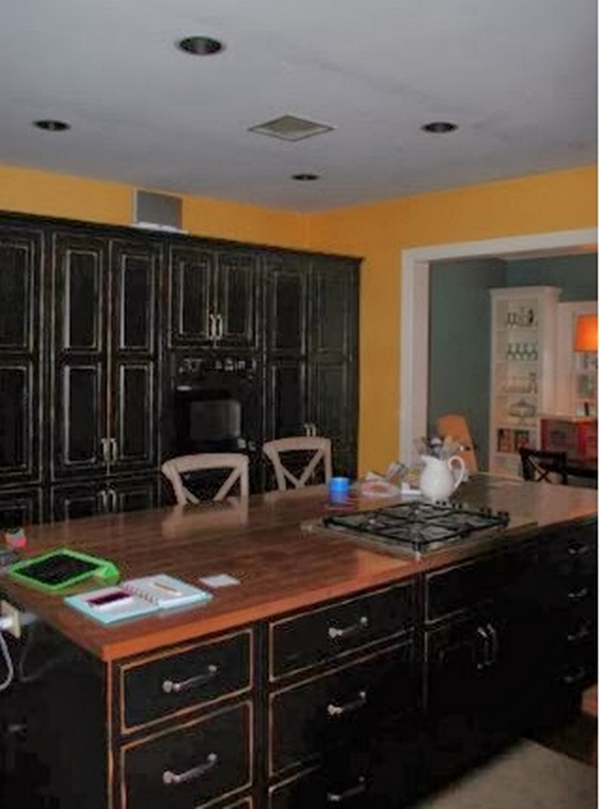
(Can I just say that looking at this old photo of where the kitchen started for us a year ago makes me positively giddy?! I couldn’t be happier with the outcome. Read on to the end, you’ll see :)
By now, I practically consider myself an expert on painting kitchen cabinets so I’m going to break it down for you step-by-step, and there’s even a video showing you how to use a paint sprayer!
The process is messy and drawn-out because of all the steps and waiting for things to dry along the way, but I would do it again in a heartbeat. I can’t think of anything that will totally transform the look of your kitchen as much as painting your cabinets, and hiring it out can run anywhere from $2000-$7000.
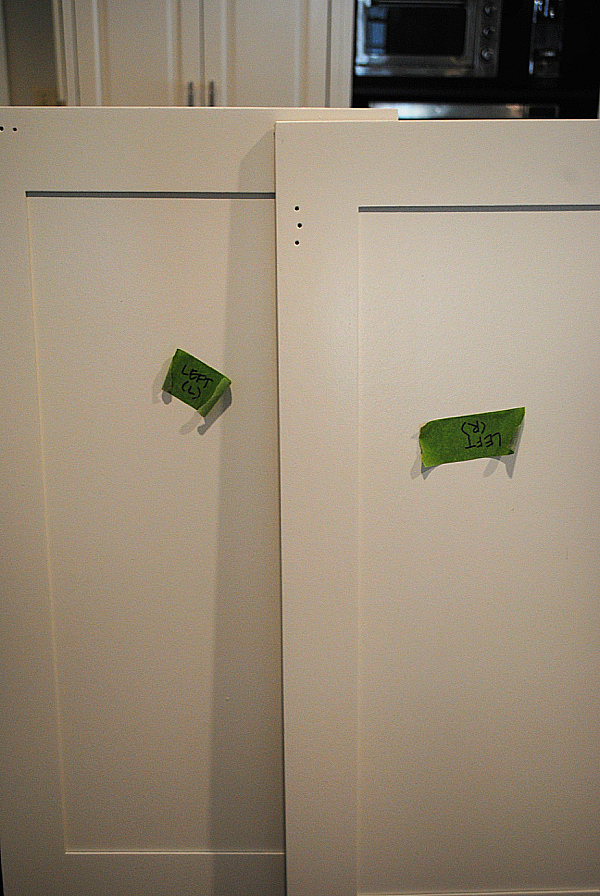
STEP ONE – remove all cabinet doors and drawer fronts, then remove the hardware from them. Label every one – you won’t want to skip this step, it makes reattaching them SO much easier! I stick a piece of painter’s tape on each door/drawer and label where it goes. Also label and/or organize hinges and any hardware you’ll be reusing.
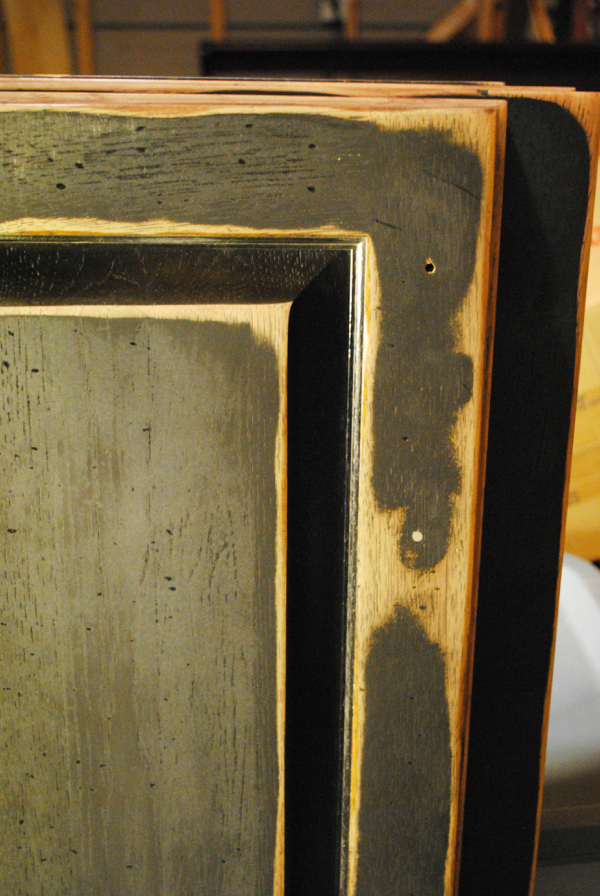
STEP TWO – if you’re going to be replacing the hardware with something that has different holes than the original hardware (which I was), fill the old holes on both sides of the door with wood filler and let dry overnight.
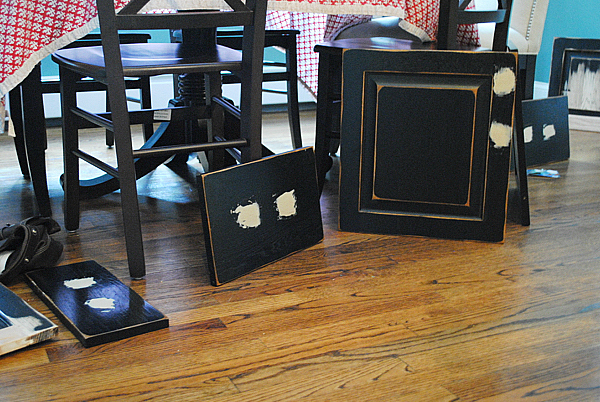
STEP THREE – sand dried wood filler smooth. I use coarse grit sandpaper first then finish with fine grit. I also use an electric pad sander hooked up to a dust extractor. The sander gives an ultra smooth finish and the dust extractor cuts down on the mess, a lot. (This is a good sander and this is the dust extractor I have.)
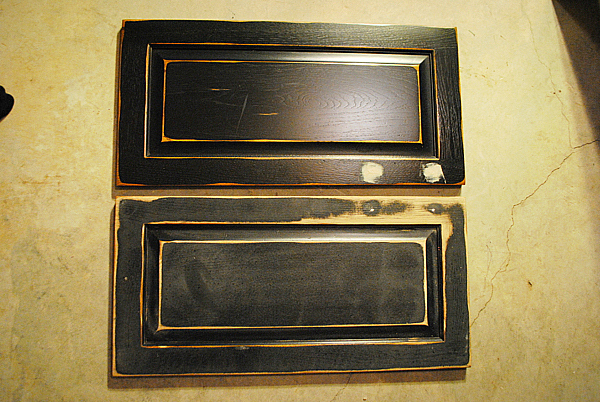
STEP FOUR – go over all doors, drawers, and actual cabinet frames with fine grit sandpaper (I used the pad sander and dust extractor again here). You do not have to go down to bare wood, you just need to rough up the surface a bit. You can see here how the sanded door looks duller than the unsanded one.
STEP FIVE – either wipe everything down with water and a lint-free cloth or vacuum to remove any debris before painting.
STEP SIX – Give everything a coat of primer. I use a foam roller and a brush for the cabinet frames and a paint sprayer for the doors and drawer fronts.
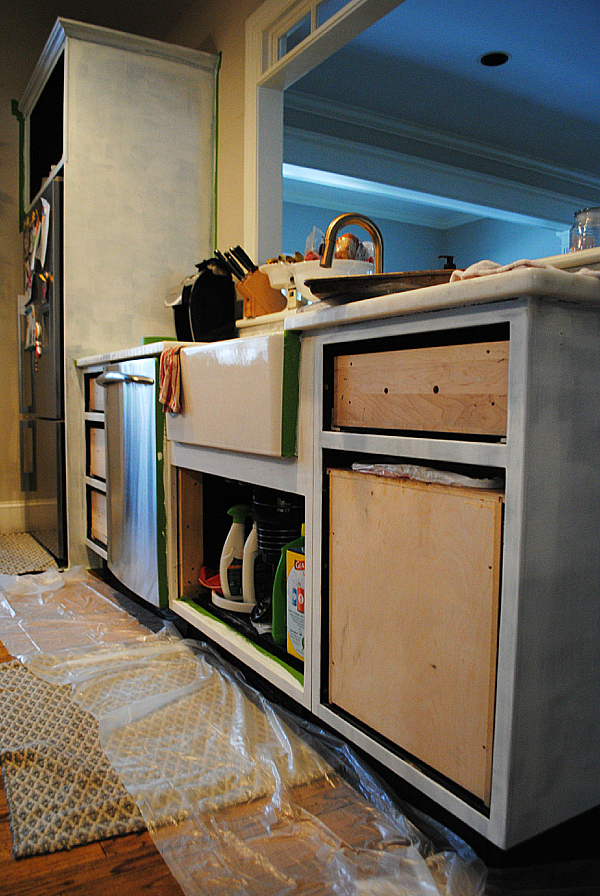
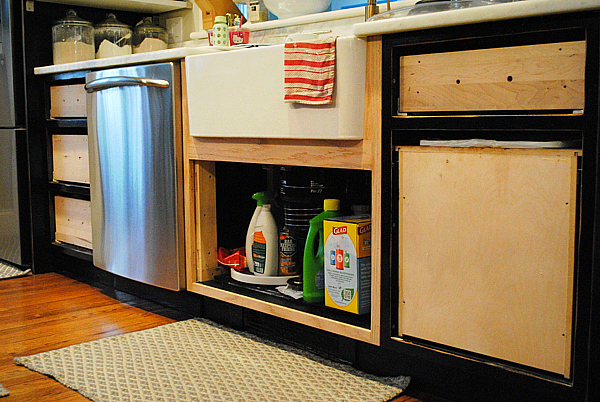
I lay 2×4’s inside an area I taped off with plastic sheets and put the doors and drawers on top of the 2x4s.
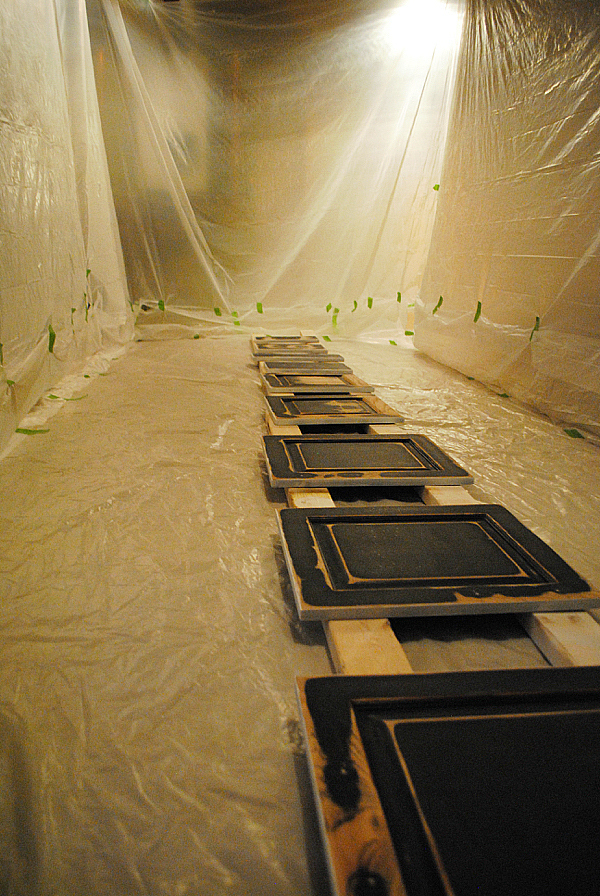
I made a quick video (under 5 minutes) going into a bit more detail on painting with a sprayer and showing you how to use one. The one I’ve used for awhile now is Homeright’s Finish Max Pro. If you are reading this post, and presumably getting ready to paint your kitchen cabinets, you should definitely, definitely buy this. I’ve painted kitchen cabinets without this sprayer and I’ve painted cabinets with it and it is awesome. The finish is SO smooth and it saves loads of time over rolling and brushing. If you buy yourself one piece of equipment to do this job, this is the one to get.
STEP SEVEN – apply paint. As with the primer, I used a brush and foam roller for the cabinet frames and the sprayer for the doors and drawers. I found two coats of paint was enough coverage with the roller and three was the right number with the sprayer. I let the final coat on the doors and drawers dry overnight before flipping them to make sure there was no tacky paint that would stick and peel off. This process can take a few days because of drying time, but if you’re using a sprayer, the active time is actually pretty minimal.
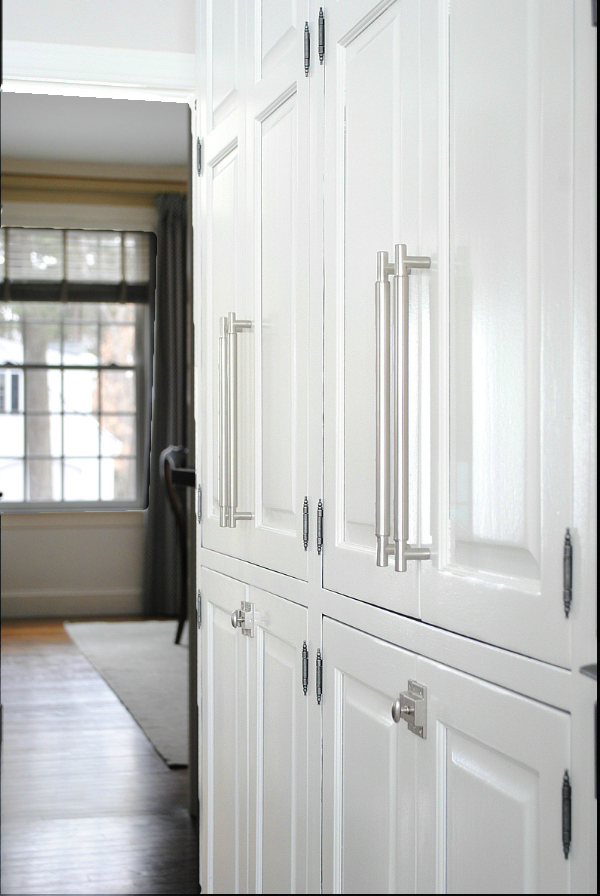
As far as which paint to use, my go-to is Sherwin Williams Pro Classic in semi-gloss. It has amazing self-leveling properties (which means it levels out bumps to dry really smooth) and dries hard, almost like an oil paint. But it’s water-based so is easy to clean up. It’s my favorite for cabinets. I had Sherwin Williams color match Benjamin Moore’s White Dove because it’s my favorite shade of white.
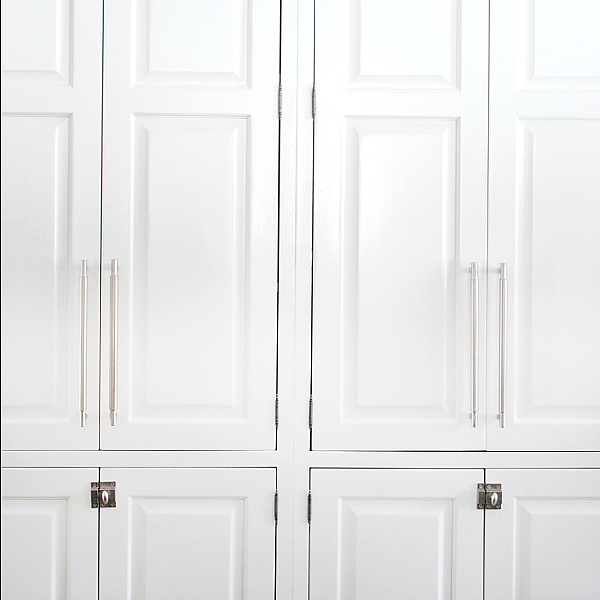
STEP EIGHT – reattach the doors, drawers, and hardware. You can see my painter’s tape labels are still hanging by a thread and they make the reattaching part so much easier!
Pat yourself on the back. You likely just spent a couple of weeks living in mess, with your kitchen torn apart, BUT you saved yourself thousands of dollars and your kitchen looks completely transformed.
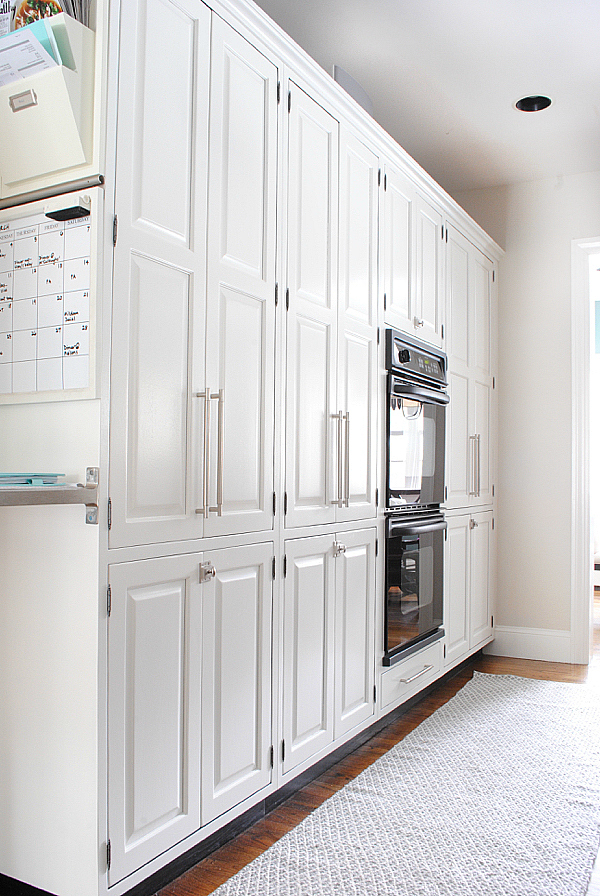
What a change, right?!
This post is sponsored by HomeRight. All opinions and ideas expressed are my own and are sincere. As always, I only ever share products I truly love and use myself.
Post contains affiliate links.


Hi! Looks gorgeous! What kind of paint did u use to paint them?
Can’t believe I forgot that part! Just updated the post. I used Sherwin Williams Pro Classic in a semi gloss finish.
What type of primer did you use, and did you also use the sprayer to apply the primer? You kitchen looks gorgeous! I’m hoping to do mine in the next couple of months and this post was perfect timing!
I used a general-purpose Kilz primer. They also make one called Adhesion that is great if you have rather slippery surface to work with. I use the sprayer for the primer on the doors and drawers and used a brush and foam roller on the cabinet frames, same as with the actual paint. Good luck with your project – it took me a year to gear up and do it and now I so wish I’d done it sooner!
Looks so much better! I always love a white kitchen. I have done this once and it was not fun. Such a process but worth it. xo
Ah, me too. It’s made the room so much brighter!! But yes, long process, but the end is worth the effort!
Looks so good! The plan is to leave our kitchen alone until we can gut it, but you’re making me want to do otherwise. :)
Haha! I was just telling a friend yesterday that being able and willing to do these things is as much a curse as it is blessing :)
Hoping to be tackling this soon-ish… love the tip about the sprayer… I have the smaller version but thinking it’s worth the upgrade for this. Is it a compressor sprayer or just electric but high power? The kitchen looks like a different space!!!
Electric still but more power. I could be imagining it but I think the finish is even smoother than their smaller model. Hopefully this is not something you will be tackling pregnant?!
Probably not. :) Given that bending is already an Olympic event, I’m afraid the next 2+ months are going to get gnarly.
This is awesome. Your video was awesome also and even better than your last! I used oil based for my kitchen last year and I’m already not thrilled with it, since there are already some places wearing off. Def going to try your recommendations for my next go-around!
I tried putting in some fancy transitions like your video :)
Wow Jennifer! It looks amazing! So light and bright!
Thanks, Bethany! I am THRILLED with the results!
they look so good!!!! and you are so awesome. the end.
Thanks, Cassie! I still have the island to do but I am SO HAPPY with how it’s coming out!
You are so good!!! The cabinets look awesome! And I love how you paint in socks ;)
Haha, yes, I totally paint in socks! They don’t get slippery on the bottom and I don’t care if they get paint on them :)
Oh yeah baby!!! Now that is a transformation. Ive painted my fair share of cabinets too and my homeright sprayer made life so much easier. Loved your video too babes:)
The thing is magic maker! Don’t you totally hate the project…but love it too?!
That is one amazing before and after! I really liked the black cabs, but WOW! Light and bright for the win! Great tutorial, too, Jen.
I know, I was more torn than I thought I’d be about painting over the black. But the kitchen is SO much brighter now. I’m such a magpie for light. Thanks, Jennifer!
Your finished product blew me away! Thanks for the video too, I’m absolutely amazed at the beauty of your white cabinets.
Thanks so much, Anna! It really has totally transformed the look of our kitchen. I still have the island to do and can’t wait to have it finished!
I was just re-reading your post (I’m still drooling over these white cabinets!) was one coat of primer enough to cover the black paint? Also, did you use any wood-filler to cover dings and/or wood grain?
I didn’t use any kind of filler – the cabinets were in really great shape and didn’t really need it. But you certainly could if that was something you needed for dings or wanted for wood grain. And I did use just one coat of primer. That plus two coats of paint (three with the sprayer) was enough to cover the black. You could do two coats of primer if you wanted though. It wouldn’t hurt!
One last thing: I just bought Sherwin Williams Classic Pro paint, they said I’ll need to thin it to use the sprayer.
What consistency worked best for you? Thanks again for all your help! :)
Hi Anna – if you’re using the same sprayer I did it should have come with a viscosity cup. It tells you in the manual a number range for enamel paint, which is just the number of seconds it takes the paint to run out of the viscosity cup after it’s been thinned. Add a little water at a time (maybe 1/2 c. to a 3/4 full paint sprayer cup?), stir really well, and then test the viscosity using the cup. Even using the sprayer as much as I have, I still use this method every time I fill it up to be sure I have the right consistency!
Thank you so much for this…perfect timing, Im doing this soon!!! Thanks!!! xo Nancy
Oh good, I hope it helps you! It’s a daunting project but so worth it in the end!
AMAZING! LOVE how they came out. I’m pinning for future reference and sharing! x
Thanks, Danielle! I have such a love/hate with the project. But mostly love because of the results!
How is that even the same room??? And how have you been in that house a year already?!?!?! They look stunning…can’t wait for more views!
The kitchen feels like it has SO much more light now with the new cabinet and wall colors. And tell me about it on being here a year already. I may or may not still have some packing boxes in my “office” in the attic… Sometimes still feels like we JUST moved.
Male poster alert! Your cabinets look great, nice work. They look like solid wood? and mine are some kind of high density MDF. The paint on my current white doors have small cracks between the seams of the “frame” and the edge of the center board on the doors. Any thoughts on how to handle that during the refinishing so it doesn’t happen again. Also it looks like you built your spray “tent” in your basement? Mine may be in my garage – what are your thoughts on venting?
Ha! This made me laugh – you’re right, not too many men around here! So I know just what you mean – very common with this cabinet style (mine have them too). I just kind of went with it. I think your best option would be to fill with wood filler if they bother you. I just bought a wood filler by Rustoleum that came in a tube – might make semi-simple work of squeezing into the cracks. I did make the tent in the basement because it was winter. In the nicer weather I spray in the garage. I would open the garage door and the plastic only went about 2/3 of the way up to the ceiling so there was plenty of ventilation. I always wear breathing protection too. Any debris flies up when you’re spraying so you’ll want to do a thorough cleaning before you start!