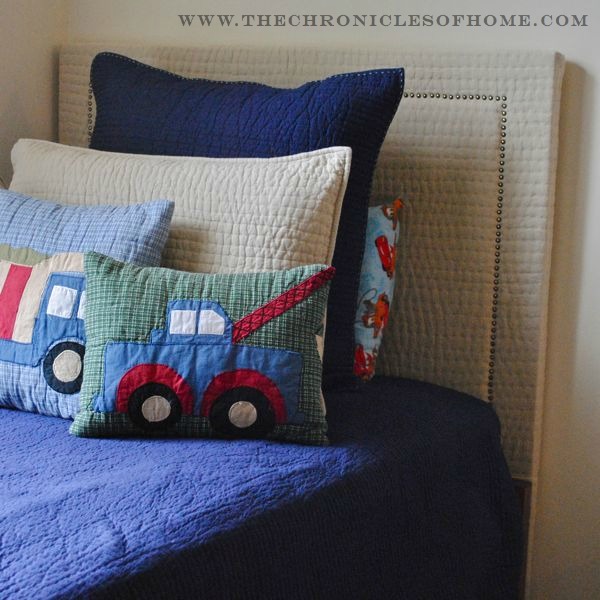
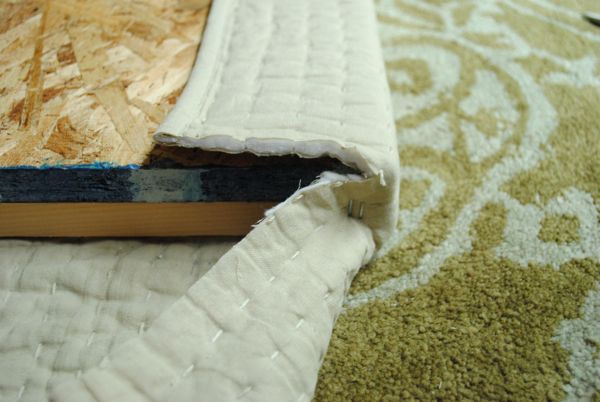
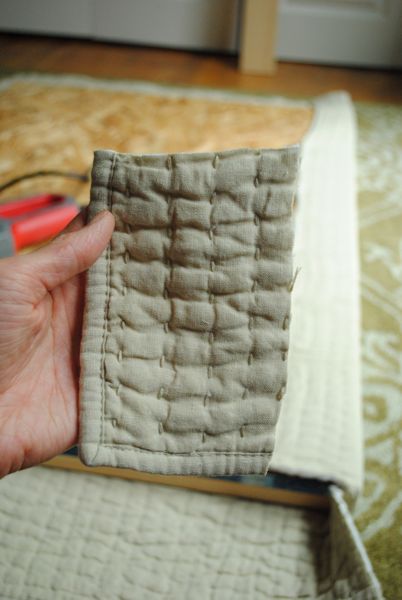
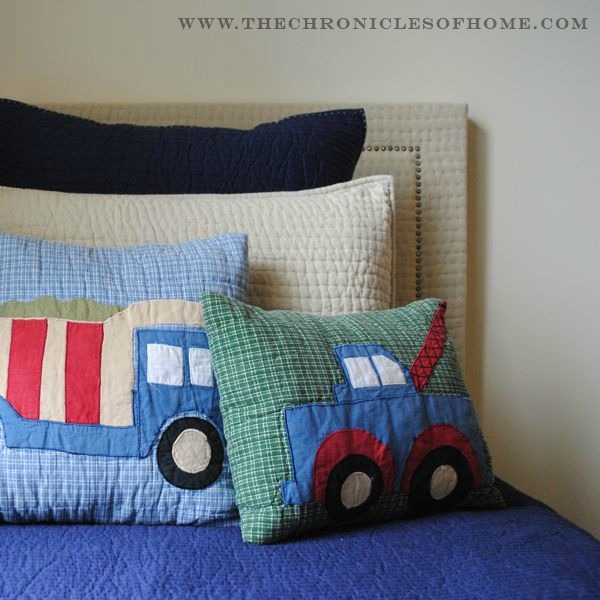
Continuing on with my work on my friend’s sons’ bedroom, I finished the DIY upholstered headboards with nailhead trim for their twin beds. Karen wanted a soft fabric and chose a pickstitch quilt to use as the upholstery fabric, which worked out great because I was able to cut out a typical step in making upholstered headboards. Usually there is a layer of batting wrapped around the headboard underneath the fabric, but since the quilt was made of two layers of fabric with batting in between, I was able to skip the batting step.
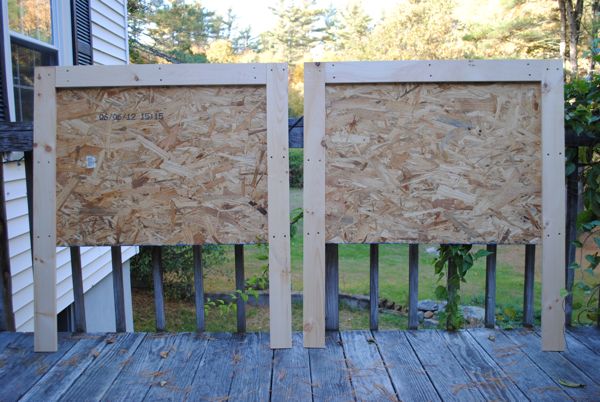
This was my first time making upholstered headboards and I was surprised how relatively simple it was. Remember that the wood cuts below are for making two twin headboards. If you’re making one, just half everything.
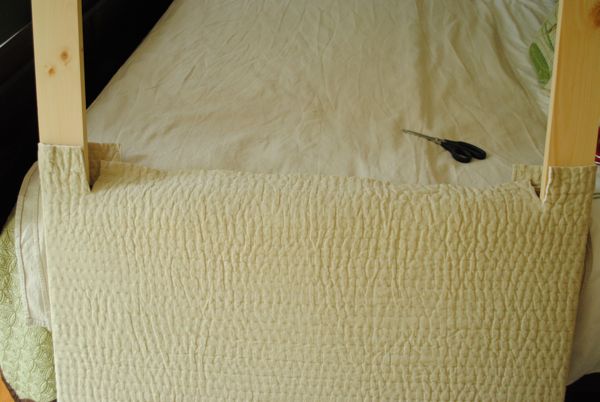
I purchased a piece of plywood from Lowes and had it cut in the store into two boards, each measuring 30″ x 42″. I also bought three 3 1/2″ wide pine planks, 8′ long each. When I got home I cut the planks into six pieces: four pieces 47″ long and two pieces 35″ long. I used 1 1/4″ wood screws to attach the pine planks to the plywood as shown below.

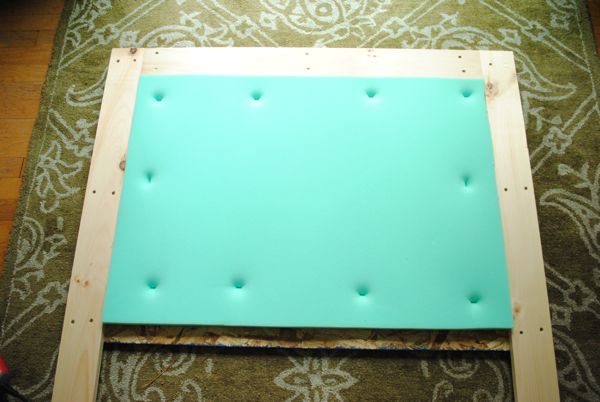
I then lay 1″-thick high density foam across the plywood between the pine planks and cut it to fit the opening.

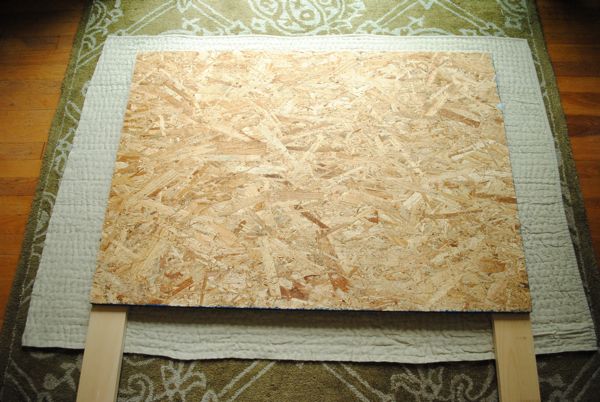
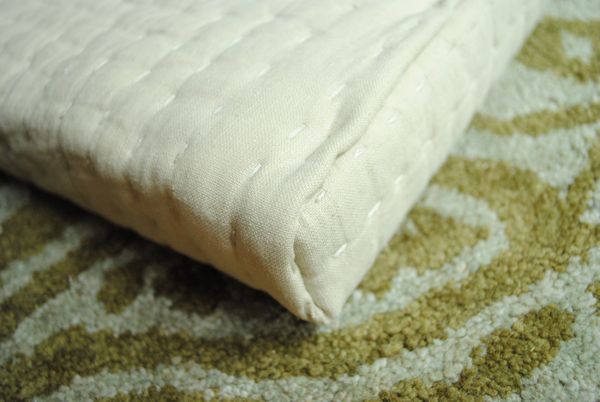
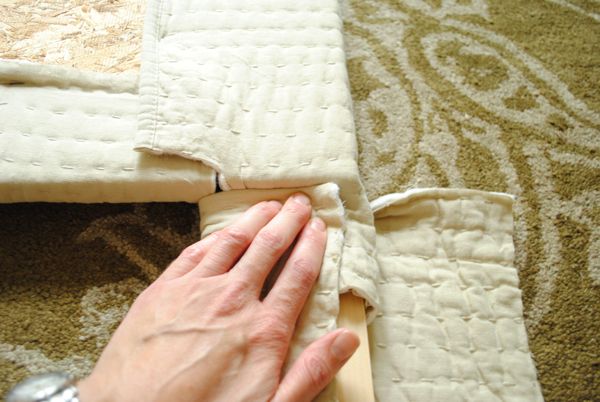
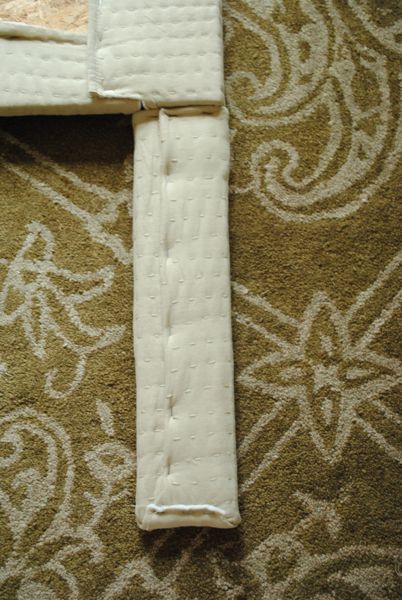
For the bottom I folded the fabric like a present and stapled to the back. I repeated with the other leg before moving on to my second headboard.
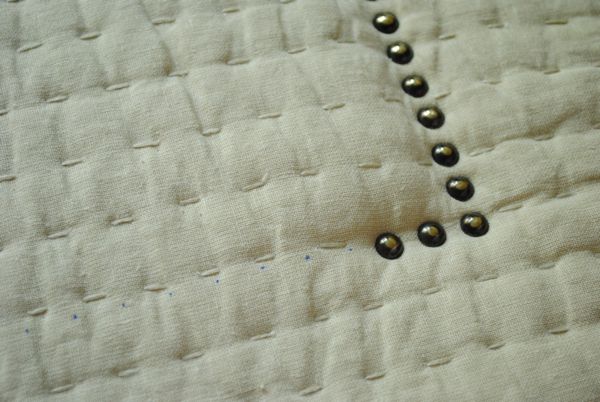
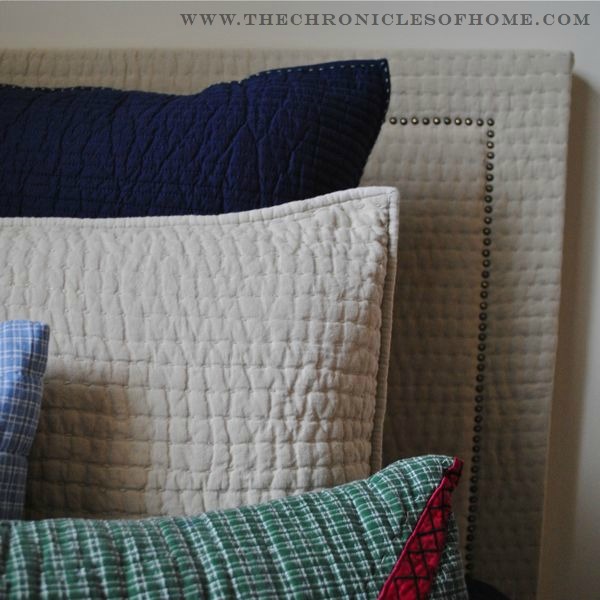
I’ve seen a lot of headboards done with nailhead strips instead of individual nailheads but I wanted the look of real nailheads so took the time to hammer them in individually. It went so much more quickly than I expected, likely because the pine I was hammering into is a soft wood so the nailheads sunk right in with a few taps of the hammer.


WOW! another awesome project over here! i love the fabric- keeps it more casual feeling yet refined, too!
Amazing! I love the quilted look…gives it a bit more masculine feel.
So pretty! I am working on my second headboard as we speak. Those nailheads really add so much:)
I love them too, I feel like I put nailheads on everything lately but they add such a nice touch, I can’t help myself!
This is so great! I can’t wait to see how you install them – I’m thinking of doing this in one of our guest bedrooms, but need to understand the mechanics of the installalation first – looking forward to that post!
I think I’ll hang them with O rings…but stay tuned, sometimes things like this don’t go as planned :)
That turned out fantastic! And such a great idea to use a quilt.
Angela
These look amazing!! I DIY’d a headboard using large canvases and it turned out great, but I would like to upgrade eventually to something more substantial and I love the look of the quilted fabric with nail head trim!!
The quilt really makes them seem extra soft and cozy!
Look so good!! Love the use of the quilt, could be a great way to get the fabric width for a queen or king!
Now THAT is genius!
They look great! How did you get the nailheads in such a straight line? It looks professional! Nicely done!
Thanks, Lo! I think hammering into the pine helps because it only takes a few hammer smacks to get them in the soft wood. I’ve found the more you have to pound nailheads the more likely they are to warp and go crooked. I also made sure the dots I marked were very straight.
AMAZING! You are super talented Jennifer. Yet another awesome project!!
You are a furniture building genius! Next time you are in Vancouver, you are making me one of these!
Oh my God. This….is sooo….brilliant! Oh, how I wish I had known how to do these when my kids didn’t have headboards!!! Thank you so much for sharing. I have to email your link to everyone. :)
Thanks for the nice comments, Khadija!
love love love it – pinning it xo Stopping by from Simple Creations party
I love the way this headboard turned out… You did a beautiful job! I am going to be tackeling my first headboard hopefully soon, this was a great inspiration. I just became your newest follower, I hope you can stop by mine.
Thanks for the nice comments, Sherry, and for signing up to follow! I’ll be sure to stop by your blog later today when kiddies head down for their naps :)
What a beautiful project! I love the fabric that you chose for your headboard. We actually did an upholstered headboard for our master bedroom and were so happy with how easy it was and the price. Your tutorial is fantastic! I wish I had it when we did ours. :) Megan
Wonderful job – I am going to attempt this in my son’s room. This may be a silly question but how did you attach the headboard to the wall or bed frame?
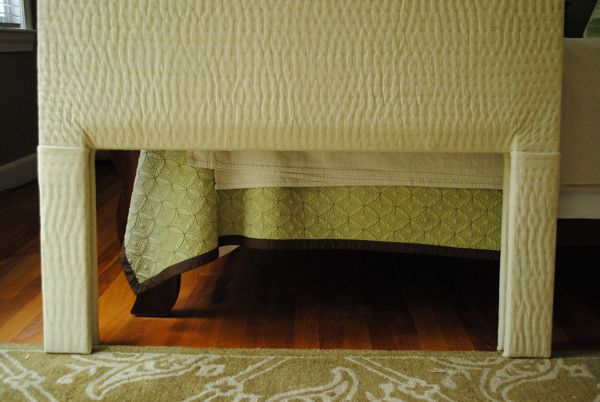
Great! Good luck!! So as it turned out, the frame of the bed was so super heavy I didn’t need to mount the headboard. It was held in place so securely by the bed frame pushed up against it. But…if I had, I would have put heavy duty “O rings” on either side of the back of the headboard and hung the rings on heavy duty hooks on the wall. Hope all goes smoothly for you!
good job!!!!!! where did you get that fabric?
It’s this quilt:
http://www.potterybarn.com/products/pick-stitch-quilt-sham/?pkey=csolid-quilts-shams&cm_src=solid-quilts-shams||NoFacet-_-NoFacet-_–_-
Love it! I am HOPING to find a tutorial that somehow connects the headboard to the frame, but I am starting to get hopeless!
Are you connecting to a metal frame? If so, it should just be a matter of drilling some holes through the legs of the headboard and bolting it to the frame. Most metal frames have holes for attaching to a headboard.