The Chronicles of Home

  • Home
  • Shop
  • About
  • The Projects
    • Decorating
    • Home Improvement
    • Furniture Plans
    • Organizing
  • The Recipes
    • Breakfast
    • Appetizers and Drinks
    • Sides and Salads
    • Main Course
    • Desserts
  • The House
  • Contact
  • Disclosure & Privacy Policy


Easy Industrial Update to an Accent Table + My First Time Making Chalk Paint

by Jennifer

I expect to use the rest of this week to show you the remaining bits and pieces I’ve been working on for my friend’s sons’ bedroom, and I’m hoping to have the big reveal of the finished space on Friday.  Hoping.
The latest addition to the bedroom was a revamped bedside table.  This table was already in the boys’ room but looked like this before I got my hands on it.

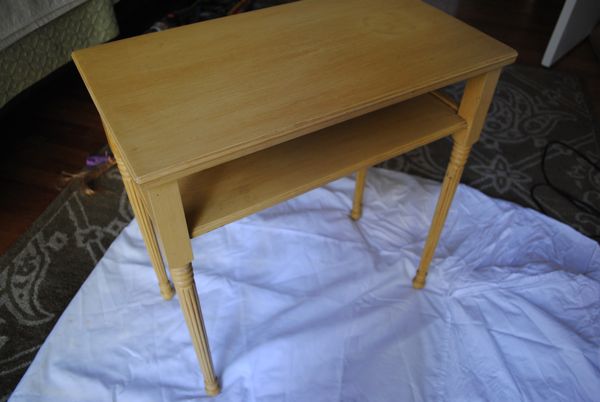
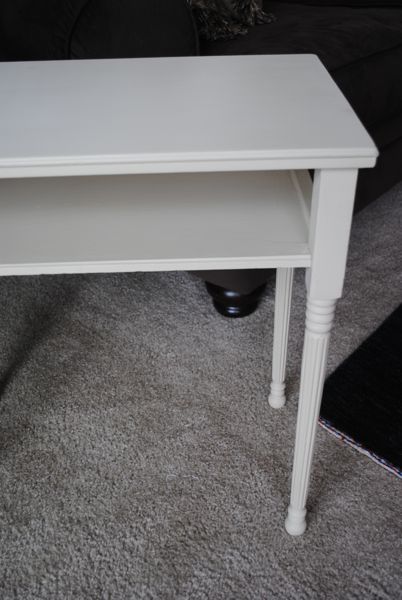
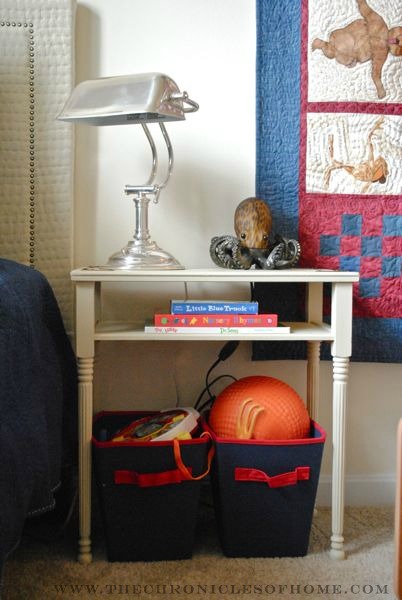
A bit worn but it has beautiful carved wood legs and I definitely felt that it was worth salvaging.  It had a pretty slippery finish and I was worried about traditional paint sticking so decided to try the chalk paint that is rapidly taking the DIY world by storm.  For those of you who have not heard of this magical product, it’s not chalkboard paint, just chalk paint.  Annie Sloane makes the gold standard version and it can be painted directly onto any wood surface without sanding or primering.  It has a matte finish and is often sanded at the edges for a slightly distressed look and then given a coat of furniture wax.

I was trying to kick this table out fast and was too impatient to order and wait for the real thing so decided to make my own chalk paint – the recipe for which also seems to be all over the place lately.  But in case you haven’t seen it, here’s how you mix your own chalk paint.

2 c. latex paint
4 tbsp. plaster of paris
2 tbsp. water
Mix the plaster of paris and water in a container until smooth.  Add the paint (I eyeballed 2 cups) and stir until smooth.  That’s it!  It’s a bit thicker than regular latex paint, so don’t worry if you try it and notice the different consistency.
I applied two coats of my homemade chalk paint to the bedside table (brush on the legs, foam roller on the top and shelf) and let dry overnight before applying furniture wax.  After the wax dried I buffed the table with a dry, soft cloth.
Big improvement already, but I still wanted to add another little detail to the table to make it look a bit more masculine.  I bought 4 brass corner brackets from my local Ace hardware store, spray painted them oil rubbed bronze, and attached them to the four corners of the table top.  It was exactly the look I was going for – interesting and sort of industrial but still simple.
I put the table in place next to one of the beds, added a couple toy baskets underneath and a lamp and nightlight on top and called this piece of the bedroom project finished!
Notice that peek of the upholstered headboard in the left of the above photo?  That’s right…I got them in place!  Turns out the bed frames were so heavy, there was no need to bolt the headboards to the wall. You can head over to my original post about making the headboards here to see a few updated photos of the headboards in their new home.

Filed Under: Uncategorized

« Butternut Squash and Lobster Brown Rice Risotto
{Tutorial} How to Reupholster a Bench With Rounded Corners »


Comments

  1. Cassie @ Primitive & Proper says

    at

    it looks so cute! i love the legs on that table!


Meet Jen

I'm a design and DIY lover, decorator, modern home-maker, foodie, fashion enthusiast, and jill-of-all-trades when it comes to home improvement. I'm slowly but surely adding classic-contemporary style to my early 90's colonial home one inch at a time and I'm taking you along for the ride.

It's often messy - there are usually project remnants and toys strewn about - but the making of a home isn't always tidy work and I love showing you how you can make and style and organize your way to a home and a life you love!

Search the Chronicles of Home


AS SEEN IN


Copyright © 2023 · The Chronicles of Home · Privacy Policy

Copyright © 2023 · Foodie Pro Theme on Genesis Framework · WordPress · Log in