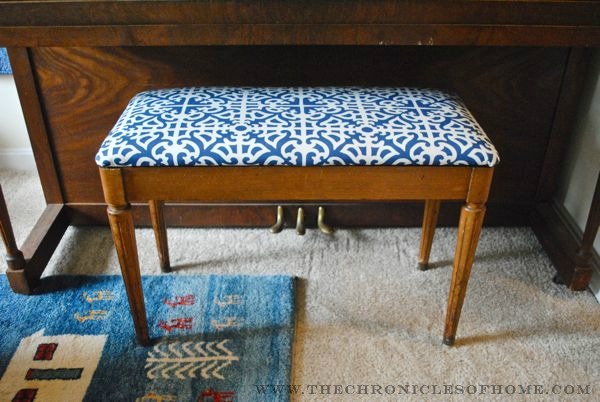
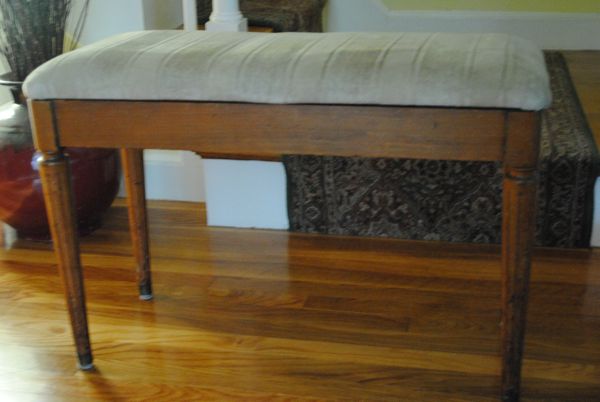
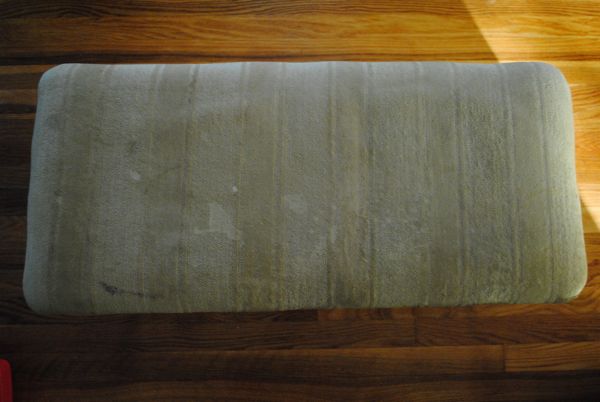
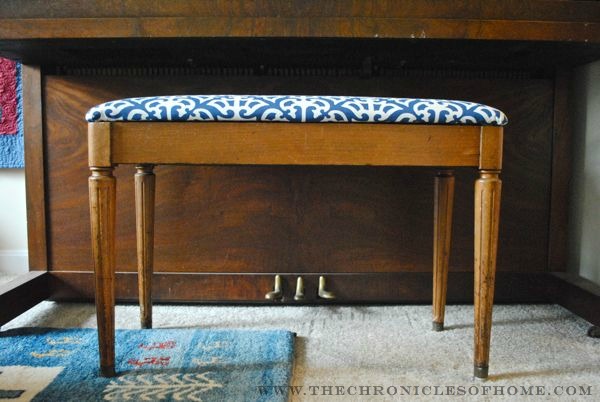
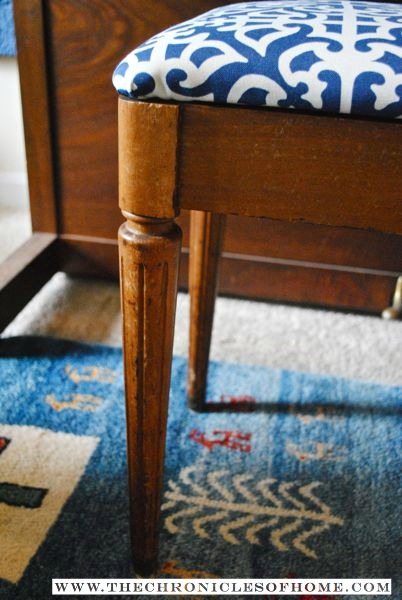
The most recent project in their room was the reupholstery of a piano bench. The legs themselves are a bit dinged up but I left the wood completely alone so it would match the wood of the piano. The top, however, had to go.
I had chosen an indoor/outdoor fabric for durability and stain resistance. And I just plain loved the pattern too (Waverly Parterre in Indigo).
If you are a beginner reupholsterer, this kind of project would be a great starting place. The step-by-step instructions would apply to any bench with a thin top cushion and rounded corners.
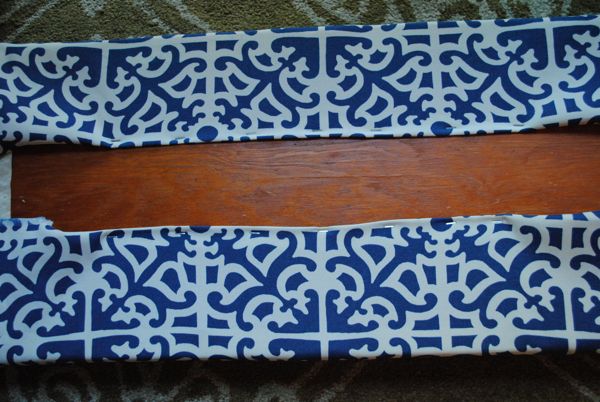
I started by separating the top of the piano bench from the legs and removed all of the fabric and staples. I took my new fabric and laid it upside down on the floor, then centered the bench top on the fabric. I trimmed the fabric so there was enough extra on each side for me to wrap and staple the fabric around the top and onto the underside of the bench. I snugly pulled the fabric on one side and used a staple gun to put several staples in to hold the fabric in place. I repeated with the other side but left the corners open.
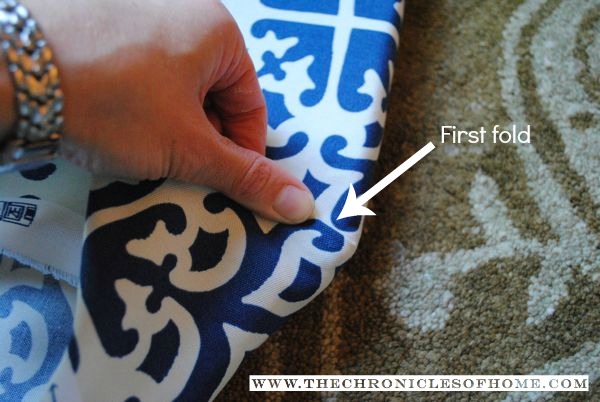
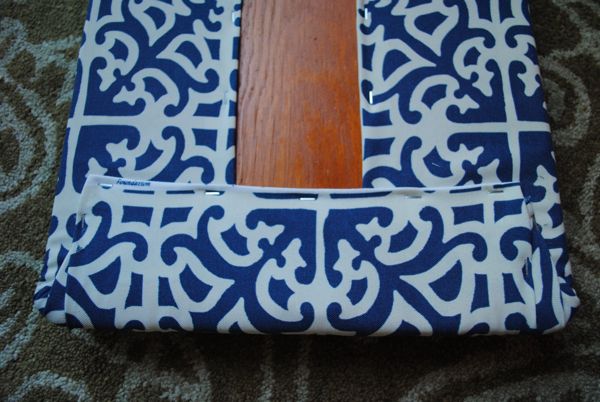
Starting with one corner, I pulled the fabric taut near the top of the rounded corner, and tucked and folded the fabric so it was flat across the corner.
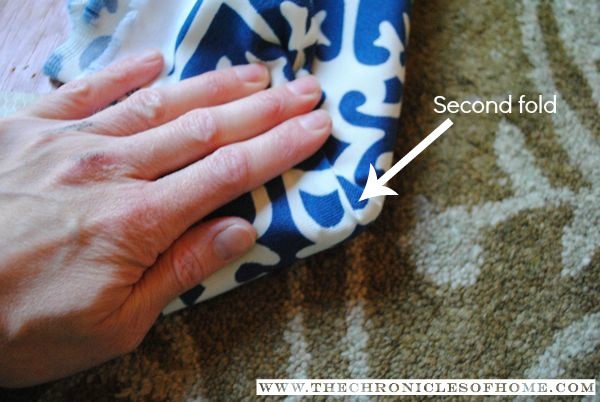
Holding the first fold down, I grabbed more of the corner fabric and made a second tuck and fold close to the center of the corner.
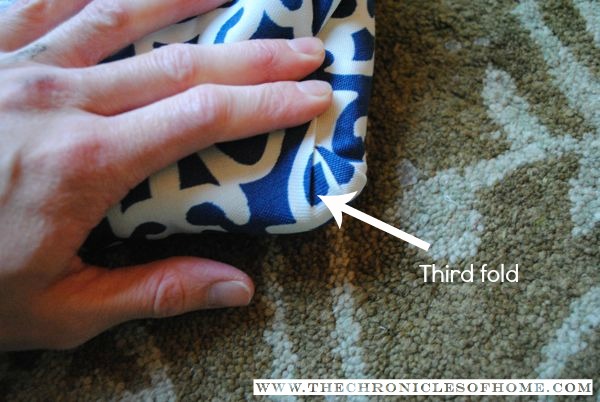
Finally, I did a third tuck and fold near the bottom of the rounded corner to pull all the remaining fabric at the corner tight across. The fabric should be pretty flat along both sides adjacent to the corner at this point.
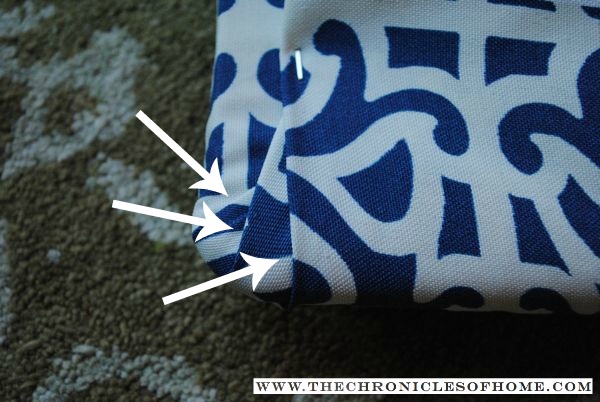
I placed a staple to hold the folds in place (see arrows pointing to the three corner folds), then trimmed excess fabric to cut down on unwanted bulk.
I finished pulling and stapling any loose parts of the fabric until everything was held firmly in place.
Then I reattached the top to the legs and admired the newly upholstered bench back at home under the piano in the boys’ bedroom.
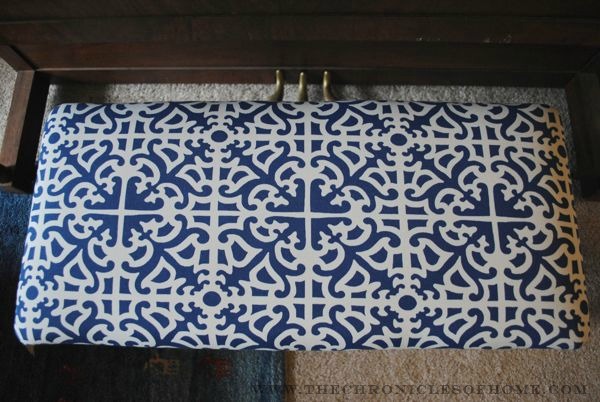
Notice how little of the folds are visible when you see the bench top from the outside. They don’t need to be invisible but shouldn’t be bulky and super obvious either. The most important things are that they are neat and fairly uniform.
Hope this helps those of you thinking about giving reupholstery a try!


Very pretty. Love the fabric.
Thanks for the great tutorial! We tried our hand at reupholstering a bench as well! http://modeandhoney.com/diy-how-to-reupholster-a-bench/
Love your tutorial too – that new fabric s too cute!