This project today shall be know as The Project That Almost Broke Me. Not because it was so hard – in fact this DIY beaded pendant light was actually pretty straightforward – but because right after I’d finished making it my garage door crashed down on top of it and crushed it into tiny pieces.
Pretty much this:

Except also trying not scream, swear, and/or cry in front of my 5 year old.
This wood bead pendant light was one of the DIY projects I did for the Home Depot Holiday Style Challenge (the DIY lacquered grasscloth coffee table was the other one). Once I recovered from the Great Garage Door Crash of ’14 I regrouped and started over again, and today I have a step-by-step tutorial for you on how to make your very own DIY Beaded Pendant Light.

But don’t hang it from your open garage door to work on it. Just don’t.
Here’s what you’ll need:
- 5/8″ square moulding
- half round moulding
- wood stain
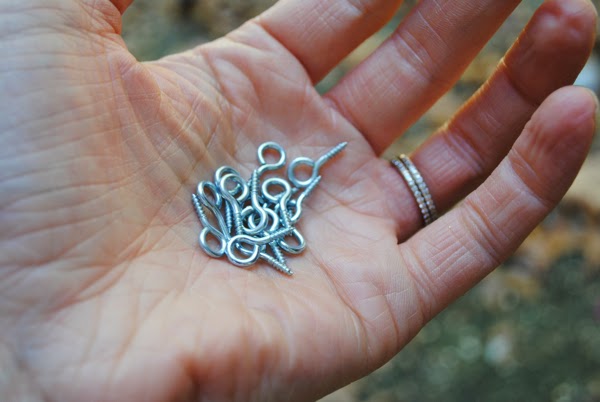
- small eye hooks (84)
- medium eye hooks (2)
- finish nails
- wire brad nails
- clamps
- fine gauge wire
- metal chain for hanging the pendant
- 3/8″ wooden beads (1000)
- 3/4″ wooden beads (500)
- 1″ wooden beads with 3/16″ hole (500)
- pendant kit
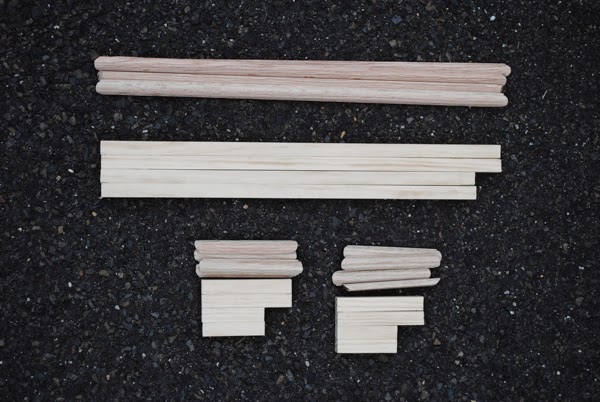
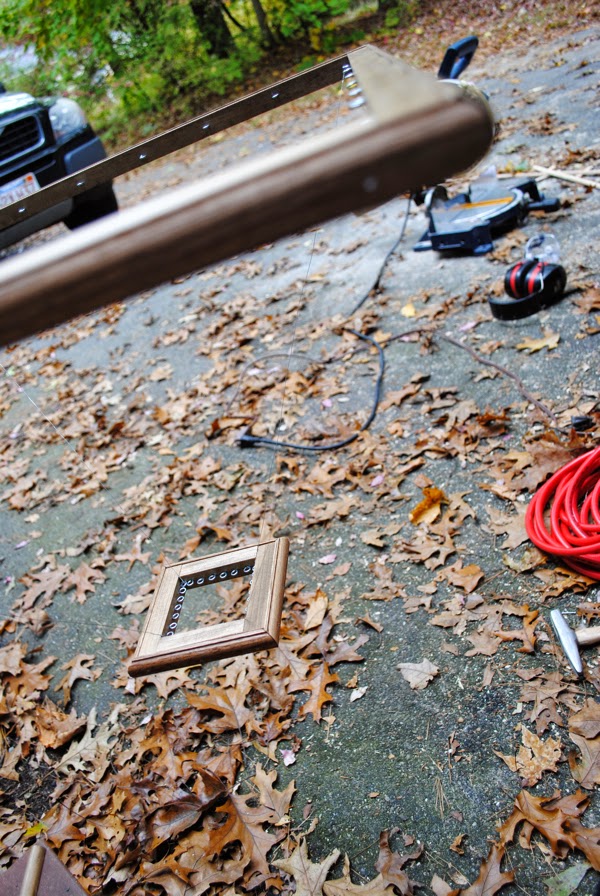
To make the frame for the light I used 5/8″ square moulding, half round moulding, and fine gauge wire.
I used a miter saw to cut the 5/8″ square moulding into twelve different pieces with straight ends:
- 4@3″
- 4@4 3/8″
- 2@18 5/8″
- 2@20″
The half round was cut into 12 different pieces with 45º angled ends (measurements are for the shorter side):
- 8@4 3/8″
- 4@20″
- 1@4 3/8″
- 1@20″
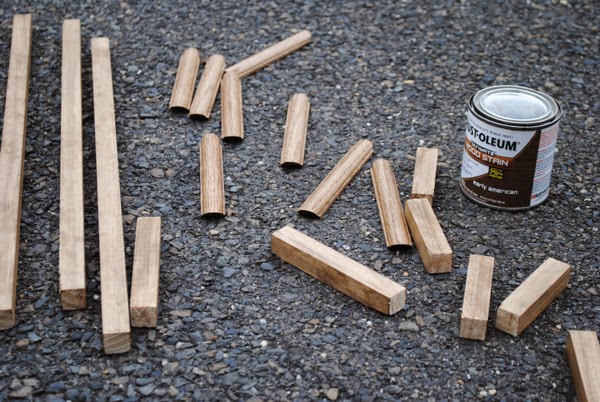
I stained each with Minwax Early American.
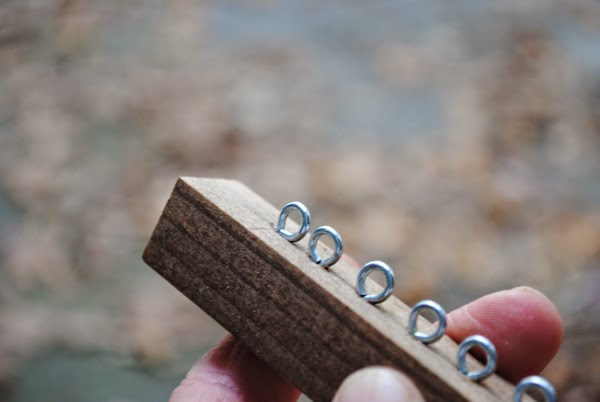
Then drilled six small pilot holes (spaced equidistantly) on all of the 5/8″ square pieces (notice how I spaced the holes on the longer of the pieces). And yes, I used a Frozen ruler.
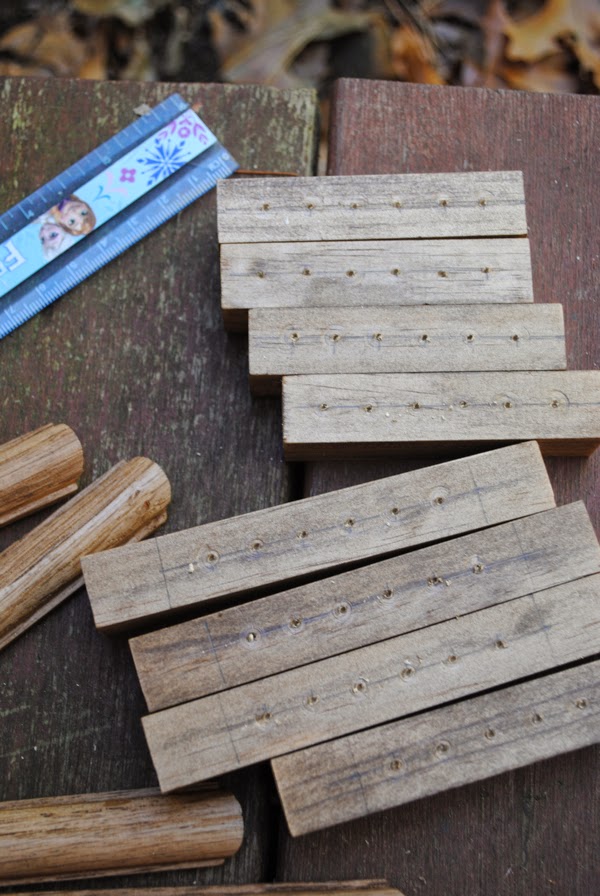
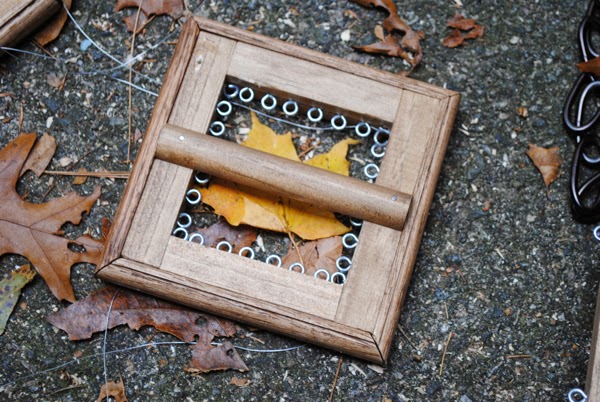
I screwed small eye hooks into each of the pilot holes – first by hand, then with needlenose pliers to finish.
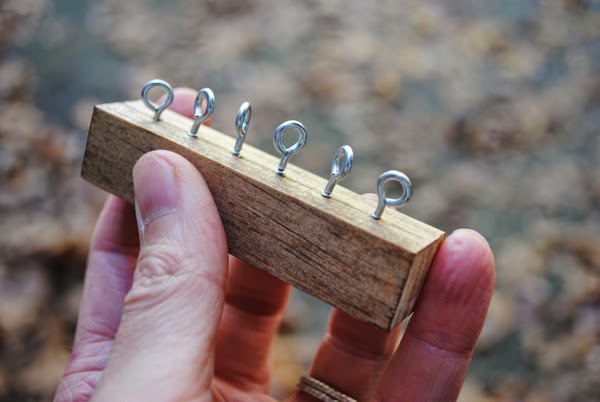
On the longer pieces (4 3/8 and 20″) I also added an angled eye hook at what would be each corner when assembled.
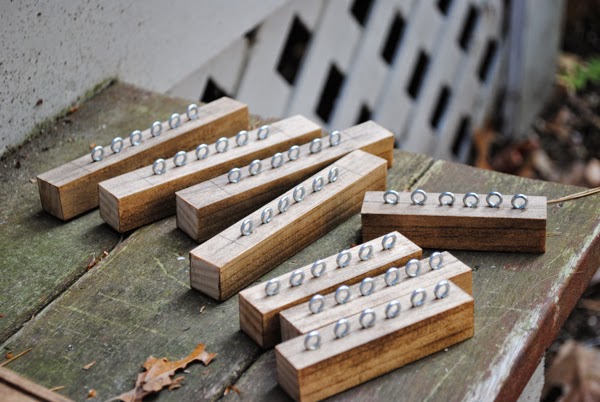
To assemble the squares that make up the frame, I clamped then nailed two 3″ and two 4 3/8 pieces together to make a square, then nailed the 4 3/8″ half round around the outside. Then I repeated to make another small square, and then with the 18 5/8″ and the 20″ pieces to make the large square for the middle of the frame.
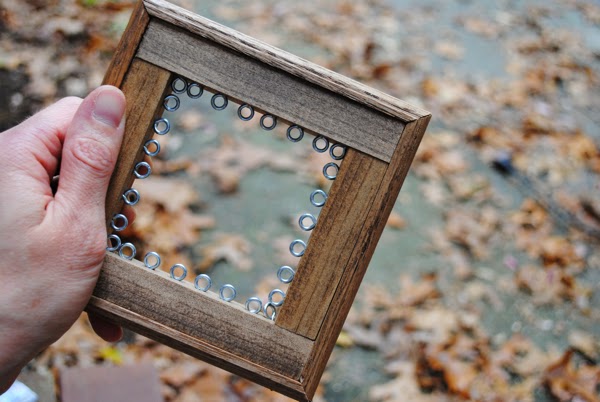
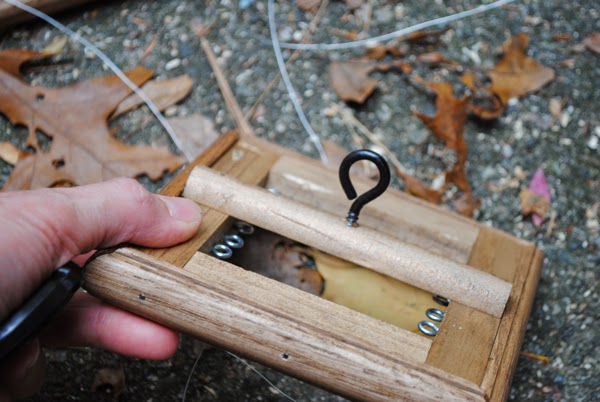
To suspend the bottom square from the center square, I cut four pieces of fine gauge wire to exactly the same size and then twisted each one from the corner eye hooks of the large square to the corner hooks of the smaller square. You want to make sure the wires are exactly the same length or the frame won’t hang straight. Corner to corner, the wire I used measures 13″, but cut them longer than this so you have some extra for twisting the wire around itself at the corners. The wire is so thin it’s hard to make out in this photo but you can see it a bit if you look at the left corner of the small bottom square.
For the top piece, I nailed the straight edged 4 3/8″ piece of half round across the top of the square to make a crossbar, then screwed one of the larger eye hooks in the center of the crossbar. I did the same for the large center square with the 20″ straight edged piece of half round.
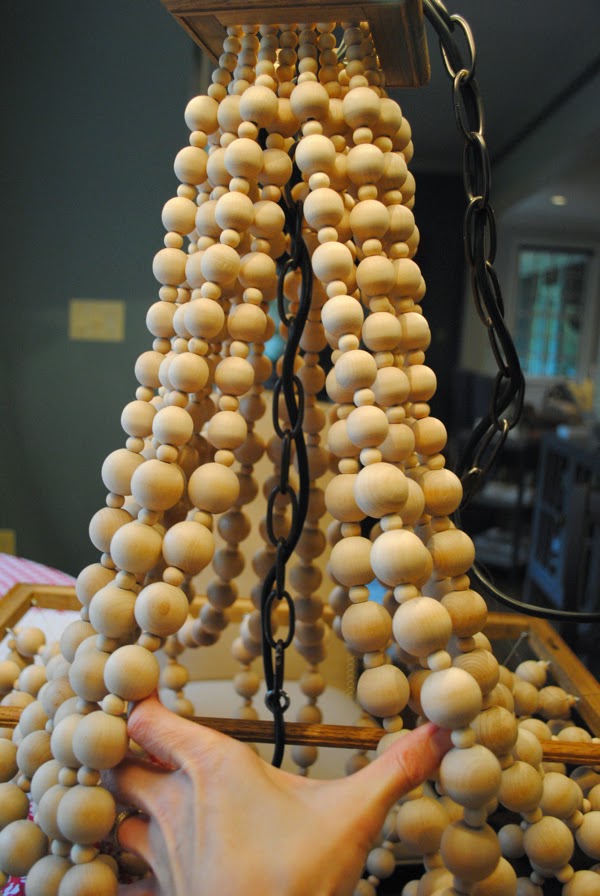
I didn’t take a photo of stringing the beads – it’s a bit time consuming, but put on a movie or TV show and the time passes quickly :) You’ll be stringing 27 strands of beads onto fine gauge wire for the bottom section of the pendant and 27 strands for the top section.
For the bottom strands I used 10 1″-beads for each strand with a 3/8″ bead in between each one and five 3/8″ beads in a row for the bottom where the strand will attach to the frame. I also added a few 3/4″ beads between the 1″ and 3/8″ at the bottom for the corner strands – just eyeball how they look once attached and see if they need a little extra to drape properly.
For the top strands I used five 3/8″ beads in a row at the top of the strands, then alternated large and small again with seven 3/4″ beads and ten 1″ beads on each strand.
To suspend the top small square from the center large square, I strung the metal chain from one of the larger eye hooks to the other. It measures 17″ hook to hook. To attach the beaded strands you just twist the fine gauge wire from eye hook to eye hook. I suspended the frame from a sturdy light fixture in my kitchen to work on it. Well…the second time around. I started working in the garage but we all know how that turned out…
You can also see in the above photo how I twisted the wire from the pendant kit through the chain, leaving the part where the light bulb screws in hanging below.
I continued twisting the wire through the top section of the chain that will hang from the ceiling.
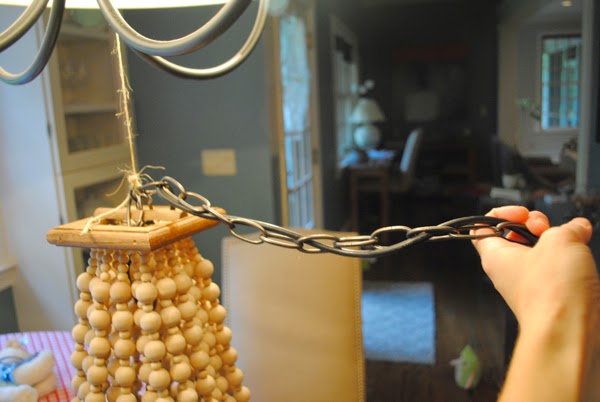
I twisted a bit of fine gauge wire around the top of the chain – this will feed through the pendant kit canopy to actually hold the fixture up. I secured it around the metal bar that sits under the canopy.

To install the pendant kit I followed the directions included in the package. Its’ pretty simple matching of colored wires – I talked about how to swap/install hard wired light fixtures HERE.
The finished pendant is pretty heavy so you’ll definitely want someone to hold the light fixture for you while you hang it – you need two hands to do the wiring.
I love how the pendant came out and how it looks in my living room! I used a large round light bulb, which I like the look of better than a standard-sized one. The bulb hangs slightly off center because of the center crossbar but I couldn’t figure out a better way to suspend the frame. It bugs me only slightly, but I have a feeling it’s one of those things only I will notice :)


Thanks for stopping by today. Hope you have a wonderful weekend!


i am floored. totally garage dropping, er jaw dropping, project! seriously your skills astound.
I had the garage door openers repaired the next week. Ugh. Thanks for the nice words, my friend! Happy weekend!
Oh, I am so glad you were able to fix it!! What an ordeal! It is gorgeous!!
Seriously – I was VERY close to crying. Alls well that ends well though, and this ended well for me :)
You have an extraordinary amount of patience to do it all over again…but it’s gorgeous! ;)
I think I just couldn’t let it go entirely after putting so much time, thought, and effort into it! Happy ending though :)
This light fixture is INSANE!!! I love it so much! I about died for you when I read that it had been crushed. I am so impressed you recreated it!! It’s so beautiful. Pinned!!
Thanks so much, Katja! I about died too. Awful. But I love it in the end and I did fix a few little issues I’d come across with the first one, so in looking for a silver lining, it might actually have been a good thing I had do a 2.0 version!
No WONDER I always lose those ‘guess how many jellybeans are in the jar’ contests… 1500 beads?! I would NEVER have bought that many. The whole thing looks amazing. Filing away for when we need a new pendant. Which might be soon given the blinking that’s going on with our dining room fixture… Love it!
Haha – guess what? I didn’t buy that many beads! I had to place a rush order for more midway through. Never thought I’d use that many. I love the funky shadows it casts at night too :)
Gosh you are freakin nuts! No wonder you felt like the squirrel up there LOL, you scsred me to death at 2000 wooden beads. But it did turn out AMAZING!!!!
scared not scsred ;)
Way faster than it sounds to string that many beads. I just watched my DVRd episodes of SOA ;) Nothing like drama and eye candy to distract you! Oh and I haven’t watched the finale yet so don’t say anything about it if you have!
Wow wow!! amazing job! I’m so glad that it turned out in the end! Looks amazing!!
Thanks, Sarah! Me too – I don’t think I could have handled total failure after all of that!
Oh my gosh…I am so sorry that happened to you. But on the bright side this is AMAZING! I have been wanting a wood beaded chandelier for awhile! Might just have to give it a try!
Truly pretty easy! A little time-consuming, but not complicated. I love beaded chandeliers – I have a non-DIY crystal one in our dining room and I really love both of them!
this is just so freaking awesome! I was wondering which project you were working on when the garage door crashed down. So lucky you and your girls were not in there. Anyway, the chandelier looks freaking awesome!!!!
Seriously, I thought that too – so glad one of my girls wasn’t there. Ooof… I called and had the door openers fixed the next day! One of those things that had been on my to-do for months. Thanks for the nice comment, Lo!
This is amazing!!! I have a question though.. how did you connect the beads at the very bottom of the light fixture. Did you just tie them all together?
Thank you! There’s a small square frame with eye hooks at both the bottom and the top of the fixture so the strings of beads are twisted (with the wire the beads are string on) onto the eye hooks of the bottom frame. Hope that clarifies – let me know if you have other questions!
This is incredible, Jen! What an awesome DIY…it looks so high end!
Thanks so much, Shannon! I love it :)
Dear Jennifer, I was just wondering how you determined the number of beads you wanted or had to use. I thought about doing it in a smaller version. But since I am not that good at estimating these things I just thought you may have some secret trick (or magical power) that you might be willing to share with me. Either way I just love this chandelier and it is really inspiring!
Hmmmm…I don’t really have a surefire way to estimate. In fact I estimated wrong my first time and wound up with too few beads! Maybe take 1/4 off what I used for a smaller pendant and see how that goes. As long as you’re not under a time crunch you can always order more :)