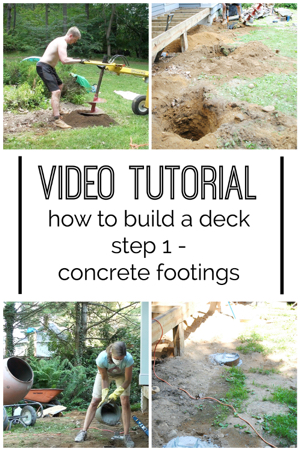
The DIY deck build is moving right along around here and today I have some details, including a video, showing you how to dig footer holes and pour concrete footings. To catch up on previous posts about the deck we’re building with Trex, click here and here.

Digging footer holes, mixing concrete, and pouring concrete into the holes is dirty, messy, back-breaking work. If I’m totally honest, I was not in awesome shape, physically or mentally, the night we finished this part of the deck build. But it’s amazing what a few days off from a project can do to re-energize you, and I always, always wind up feeling like the money I saved and the satisfaction of doing things myself is worth it in the end.
This part of the deck building process is very, very important. The concrete footings support the entire finished deck so you definitely want to get this part right. Before you get started you need to find out the building code for deck footings in your area – the holes need to go below the frost line so they won’t be affected by freezing. Here in Massachusetts we have to go 48″ down…which is pretty deep. Trust me, I fell backwards into one of the holes and it was not fun. Funny in hindsight, but not fun.
You also need to determine how many footer holes to dig. Most likely you will need to do nine of them. We only had to do six because we’re building onto an existing deck frame that already has concrete footings. For nine footings they should be separated into three rows, with one row close to the house, one row about in the middle of the deck, and the third row 12″-18″ in from where the edge of the finished deck will be.
This short video walks you through the basics of how we dug and poured the concrete footings, and then you can read on below for a list of materials and more detail.
Here’s what you need as far as materials:
- Ear, eye, and mouth/nose protection
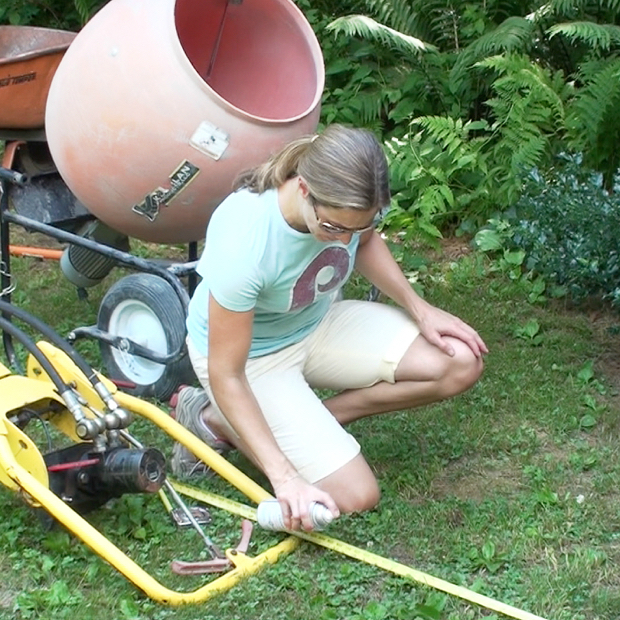
- Tape measure
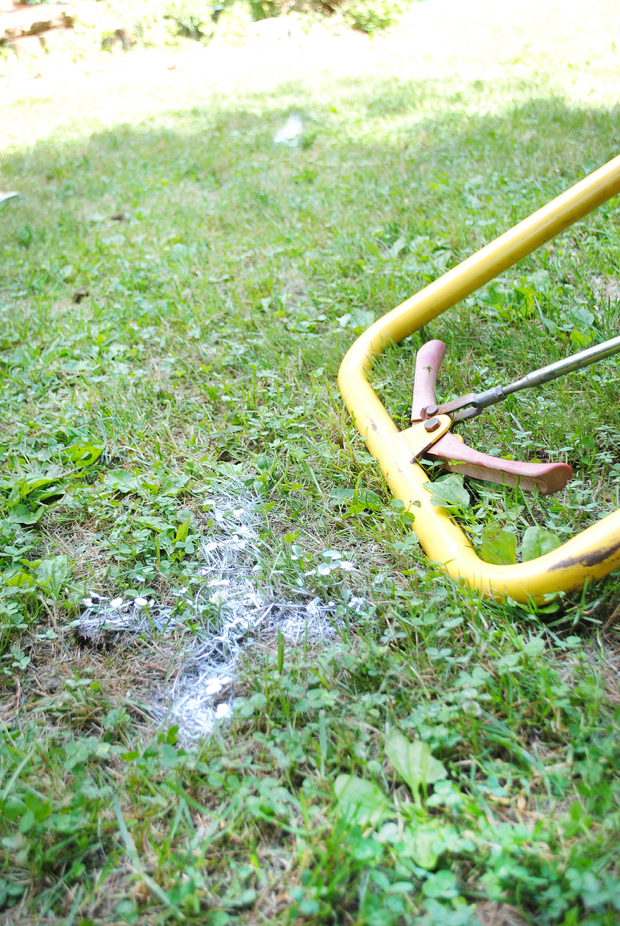
- Spray paint for marking the grass
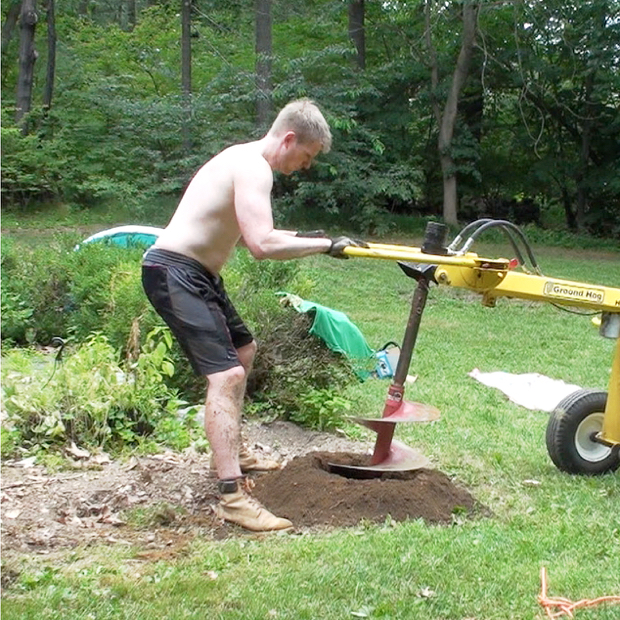
- Shovel and rented auger (optional – we rented this one)
- Six-foot level
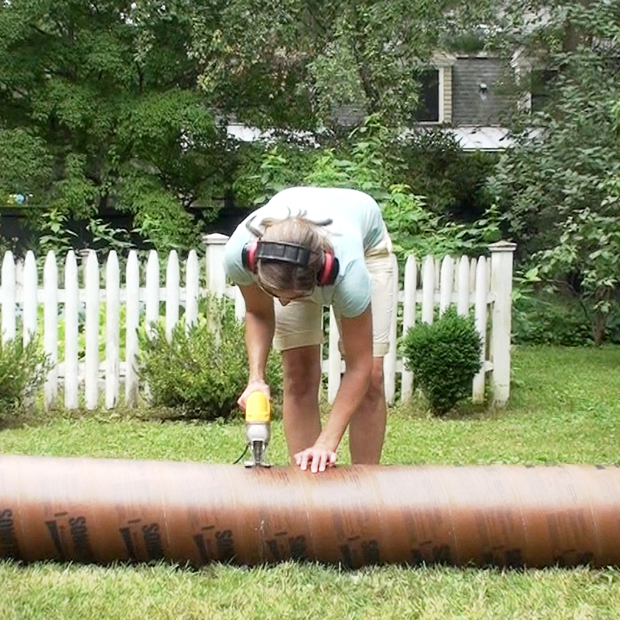
- 12″ diameter Sonitube (enough length to fill each of your holes)
- Jigsaw
- Quickcrete concrete mix (figure on 85 lbs. of concrete for each foot of the Sonitube)
- Hose
- Empty gallon container
- Small-medium bucket
- Concrete mixer (optional -we rented this one)
- 6×6 metal post base (nine – one for each hole)
- 12″ long, 5/8″ diameter galvanized sill bolt with nuts and washers (nine)
Precise spacing from the house is important here so you will need to measure the identical distance out from the house for each of the three rows of footer holes – i.e. each of the holes in the first row should be the same distance from the house, each of the holes in the second row should be the same distance from the house, and so on. The holes on the outer edges should be 12″-18″ in from where the finished deck will be and the center hole can be eyeballed between them. The distance from the house is what matters most. Use a tape measure and spray paint to mark the locations for the holes.
Use an auger or shovel to dig the holes to the width and depth specified by local code. I’m also going to contradict myself just a little here. We found the auger pretty unwieldy…and by “we” I mean Scott because there’s no way I could have controlled that thing on my own! Dig the footer holes as close to the marks you made as possible but don’t worry if they move a small bit from your original markings. You can correct the spacing in a few steps.
Once the holes in a single row are dug, use the six-foot level to check the level of the ground between holes. It doesn’t have to be exact – again, you can correct later – but you’ll want it to be reasonably close to level between holes.

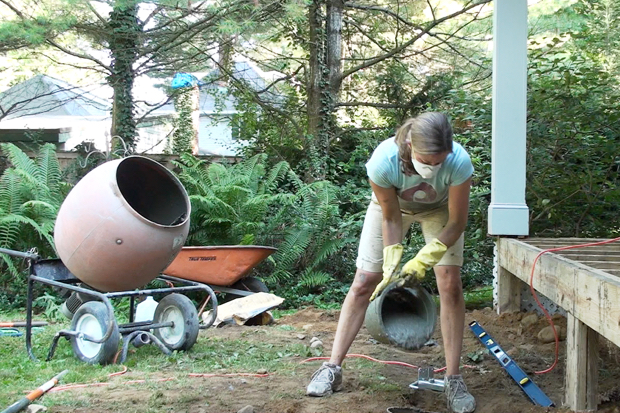
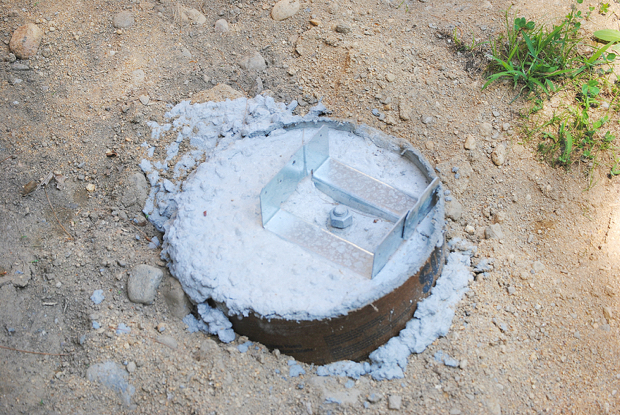
Use a jigsaw to cut a piece of Sonitube to be 2″-4″ shorter than the depth of the holes. So for a 48″ hole, I cut the Sonitube to about 45″. Set the cut Sonitube into one of the holes – it should sit a couple inches below ground level.
There will be directions for mixing the concrete on the cement mixer (you’ll use the hose and empty gallon container here). Once the concrete is mixed, pour about a foot of concrete into the Sonitube – this doesn’t have to be exact, just eyeball it. Grab the top edge of the Sonitube and wiggle and pull it upwards so the top of the tube is about even with the ground level and some of the concrete comes out of the bottom. The Sonitube should now be sitting in a little base of concrete at the bottom of the hole. Continue filling the Sonitube with concrete to the top of the tube, then use a straight edge (I used an old piece of 2×4) to smooth the top. I found the mixer too heavy to tilt and pour without dumping concrete all over the place, so I used a bucket to pour the concrete until I could maneuver the mixer.
Set the metal post base into the wet concrete.
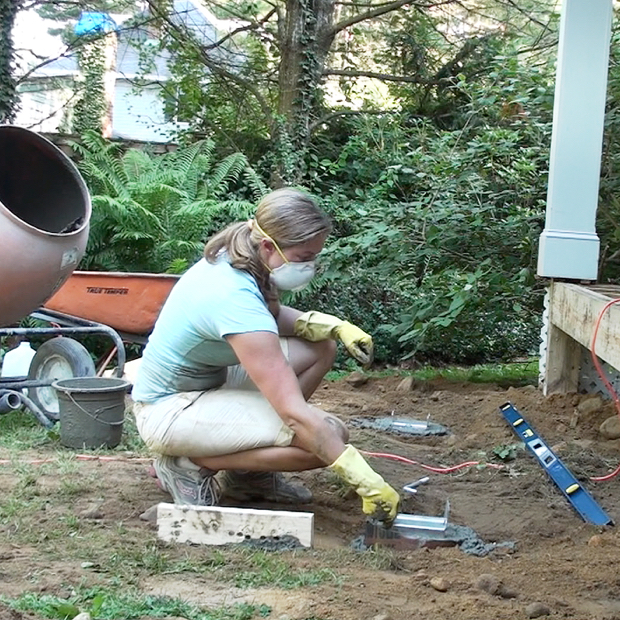
Slide the sill bolt through the opening on the bottom of the post base. Twist the nut and washer onto the top of the bolt just enough to have it fully threaded on, then sink the bolt into the concrete.
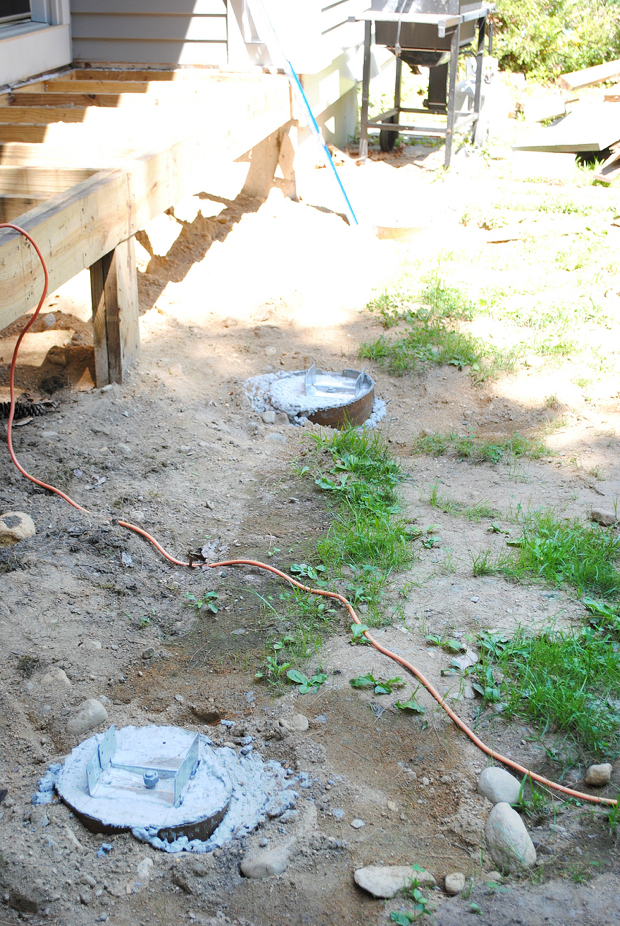
Repeat the process for the remaining holes in the row.
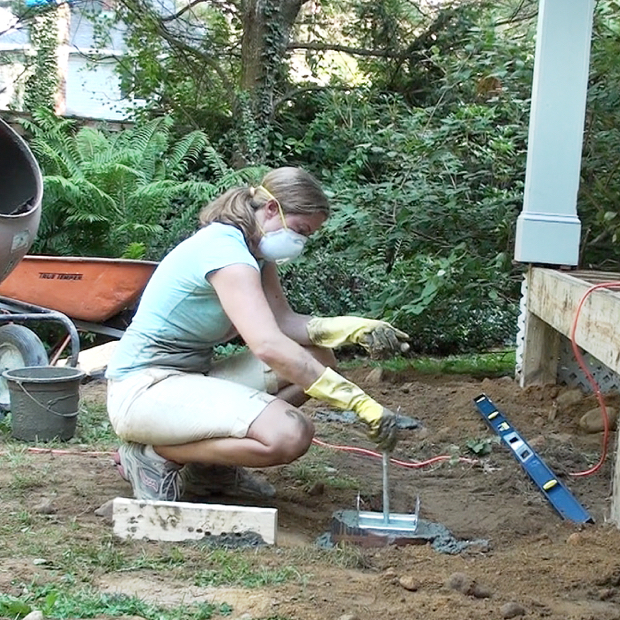
Here’s the part where you correct any wiggle in spacing that happened when digging the holes. Measure the distance of one edge of a post base from the house. It doesn’t really matter what the distance is, but it does matter that the very same distance is used for each post base in that row. I measured this several times after each post base in the row was in place to make sure they were spaced exactly the same distance from the house.
You can see here that the post base in this footing is off center on the actual footing so it maintains the same distance from the house as the other post bases. This is fine – it’s that distance from the house that’s crucial to get right to set you up for future steps.
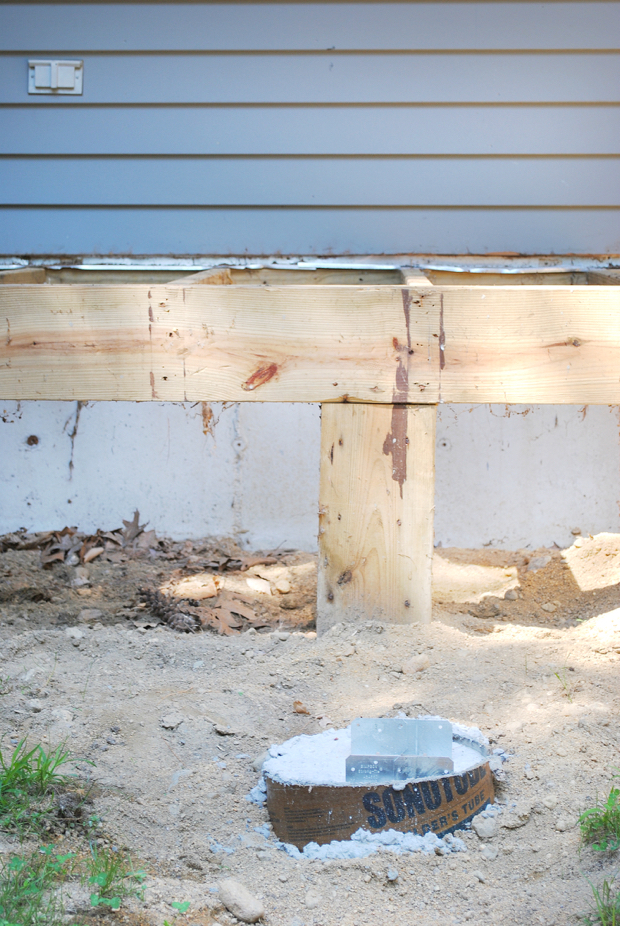
Once the concrete has dried completely, you’re ready to move on to the next step…but we’re not there yet. I’ll be back soon with Phase 2 of the deck build and will fill you in on what comes next!


Suuuuuuper behind, but completely love this Jen. Can’t wait to binge read/watch the rest of the project:)
Haha! Thanks, babe :) Feels like so long ago already all buried under snow now! Can’t wait to fully finish it this spring.