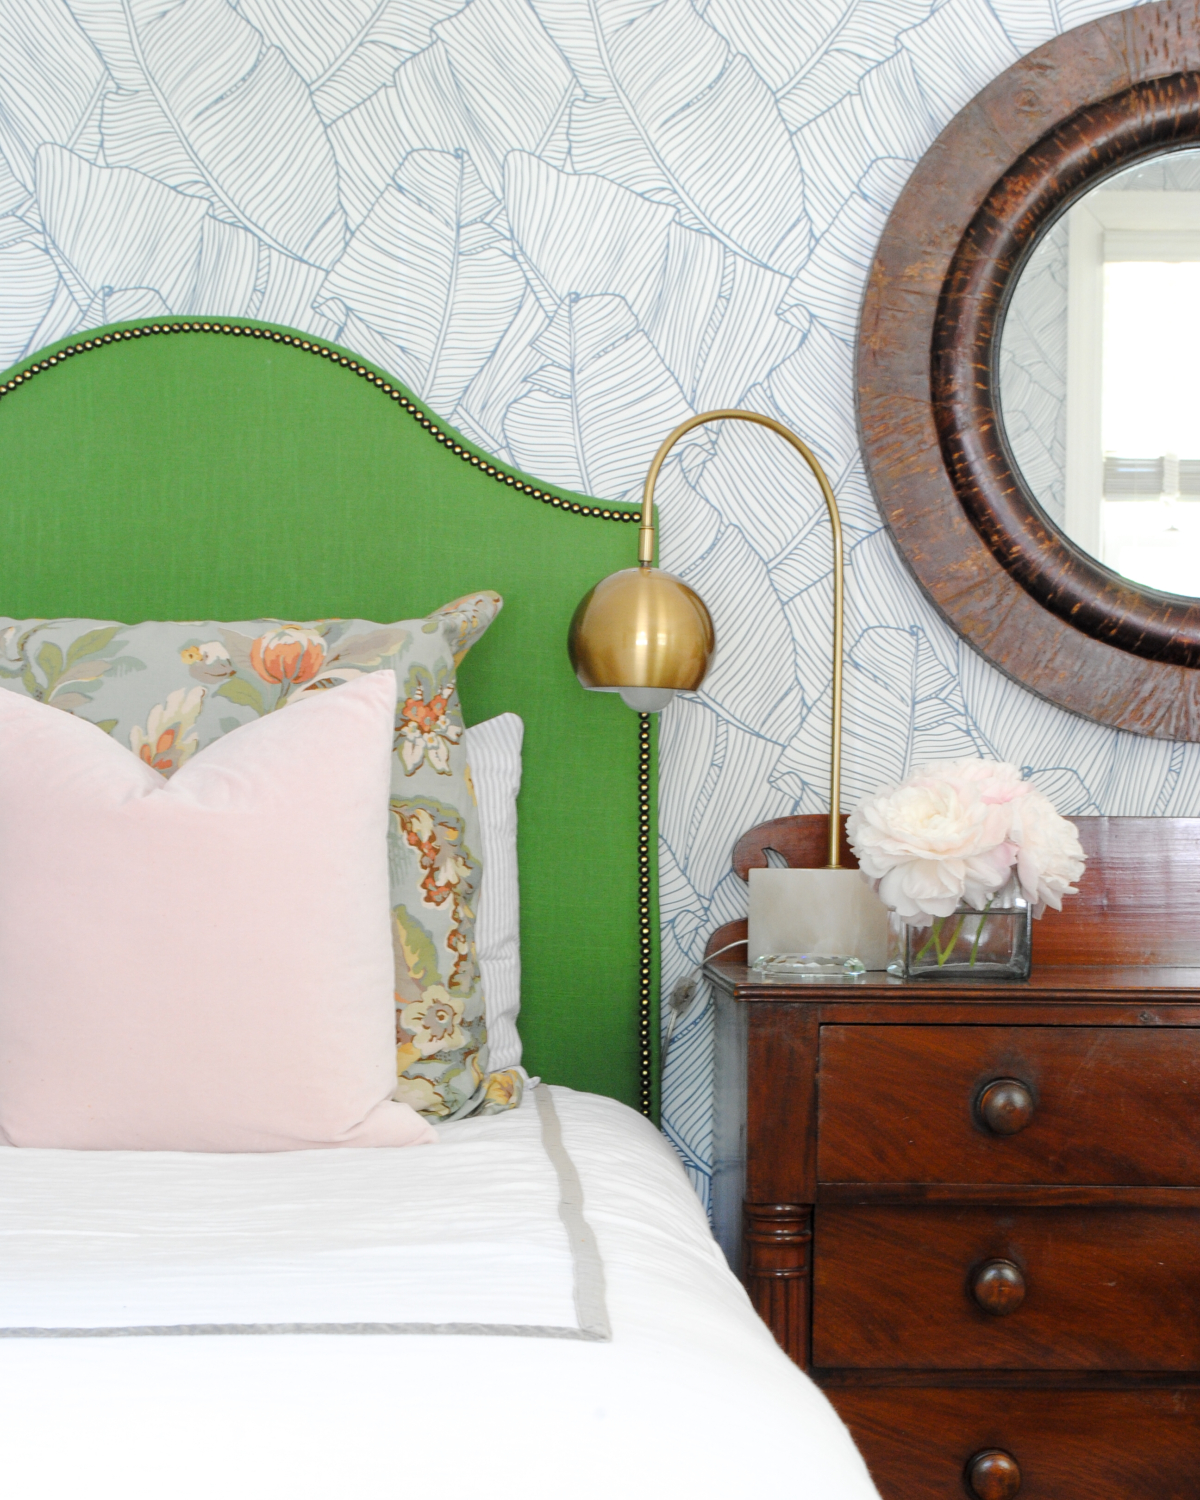
Nailhead trim is one of my faaaaavorite favorite furniture details. Its most basic function is to cover seams in upholstery but it’s come to be used as a decorative accent on many pieces as well. You can add nailhead trim to lots of different kinds of furniture – benches, chairs, sofas, headboards, things you’ve made or bought, budget pieces and high-end alike. It adds such gorgeous, handcrafted detail to just about anything and I find I’m drawn to furniture with nailheads again and again. I recently added them to the DIY upholstered headboards I made for my guest room and they were the perfect finishing touch.
I’ve added nailhead trim to a lot of different furniture by now and have worked out some of the kinks from when I first started, so luckily you can learn from my trial and error! High-quality nailheads are a must. I’ve bought ones from hardware and fabric stores and they are a nightmare. They bend so much more easily when you’re hammering them in and you wind up wasting so much time and money. Spending a little bit more on really good ones is worth every single penny.
I think nailhead trim looks best when the nailheads are applied in a tight line. You see them sometimes with space in between (and I have done it this way) but the most professional look is when they’re right next to each other. The easiest way I’ve found to do this is to draw a line to follow and them hammer the nailheads in along the line. You can see this in more detail in the video below.
Other than high-quality nailheads, a tack puller will be your best friend. Even with sturdy nailheads, they will sometimes go sideways and you’ll want to remove and start with a fresh one. Having a tack puller handy makes the removal a cinch and for less than $5 it’s a really affordable tool to add to your collection. If you do any upholstery, it’s great for removing old staples too!
Here’s a quick list of the things you’ll need to add nailhead trim to furniture.
And here’s the video showing you how it’s done!


Great job! A tedious job for sure, but SO worth all of the effort!
Thanks, Jennifer! The more I do it the faster it goes but you’re right, it is still a little tedious. I’ve started listening to podcasts while doing it!
Great tips, thank you! This is a beautiful room!
Thanks, Julie!
Love the video! You are a pro at nailheads and they add such a great finishing touch to your headboards!
Thanks, Lisa! Did you decide to go to the event in Wellesley tonight? I’ll be there!
You are good at that! And it looks so much nicer than the strips. Love the video!
Thanks, Gwen :) And I totally agree, I think the real thing looks better than the strips. There’s something about the process that’s become almost cathartic for me, honestly!
Gorgeous headboards and yes nailheads make such a big difference. Thanks for sharing your beautiful video and tips.
Thanks, Bettina!
Gorgeous headboards and yes nailheads make such a big difference. Thanks for sharing your beautiful video and tips.