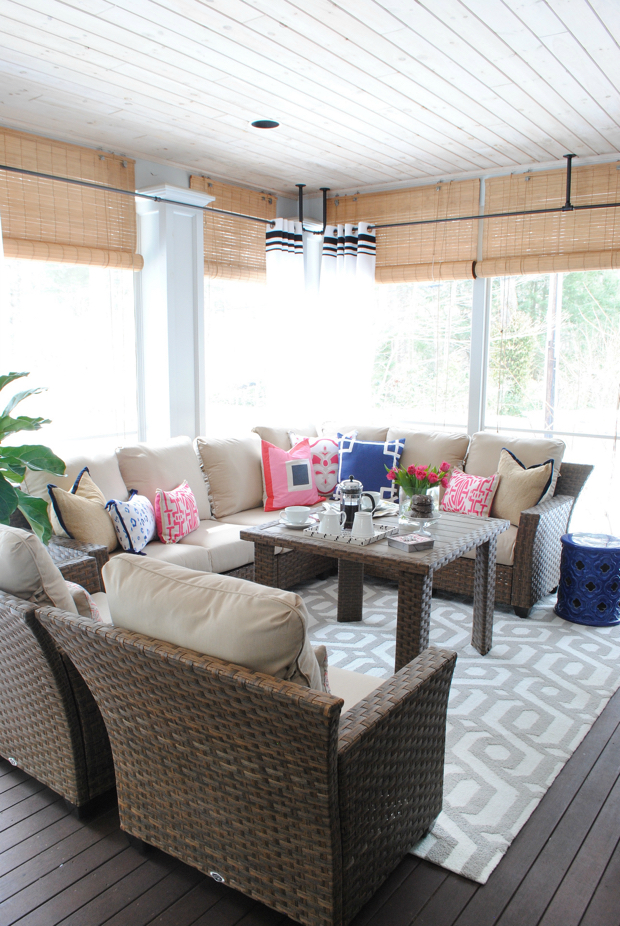
I’ve seen lots of bloggers making custom curtain rods out of galvanized pipe, and for good reason. When you have a large window or one that requires a size that isn’t readily available, using galvanized pipe pieces (found in the plumbing aisle at hardware stores) to make your own is a great budget-friendly way to get the look you want at a fraction of the cost of buying a custom rod. I knew this was the way to go when I was putting my screened porch together and wanted to hang curtains to frame the large seating area.
MATERIALS
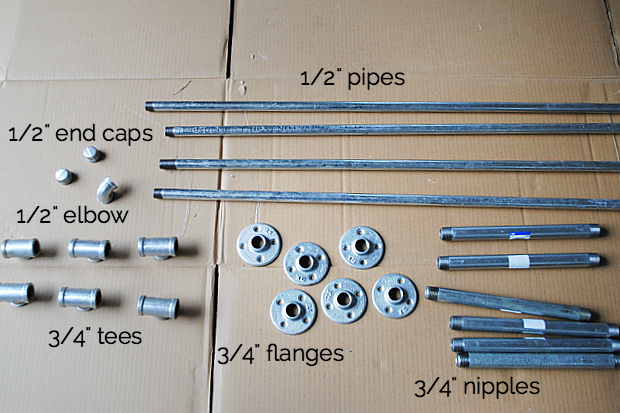
- 1/2″ diameter pipes (Home Depot cuts to size and rethreads for free)
- 3/4″ diameter nipples, 12″ long
- 3/4″ flanges
- 3/4″ tees
- 1/2″ elbow
- 1/2″ end caps
- 3/4″ coupling (not pictured)
- 1 1/2″ wood screws
- TSP or other heavy duty cleaner
- black spray paint
PREP
I actually didn’t clean my pipe pieces with TSP before spray painting and I had some issues with the spray paint scraping off while I was assembling, so I’d recommend wiping everything down with TSP and a rag before spray painting.
Once the pieces are dry, coat everything, including screws, with black spray paint.
ASSEMBLY
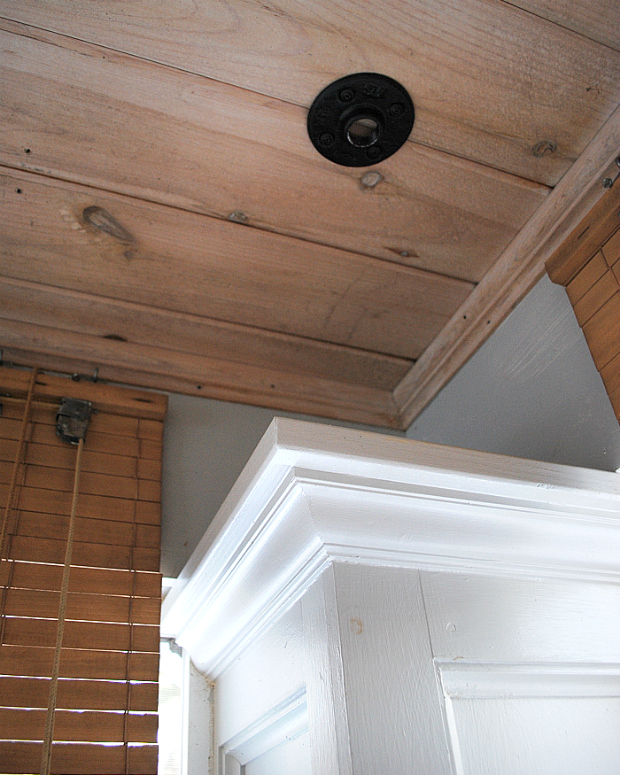
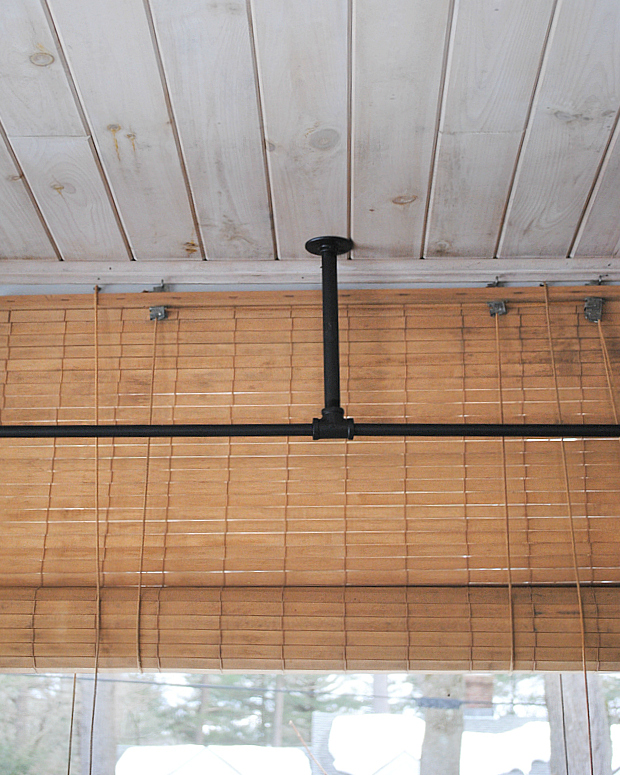
I started by marking where my flanges would go on the ceiling, then attached to the ceiling with the wood screws.
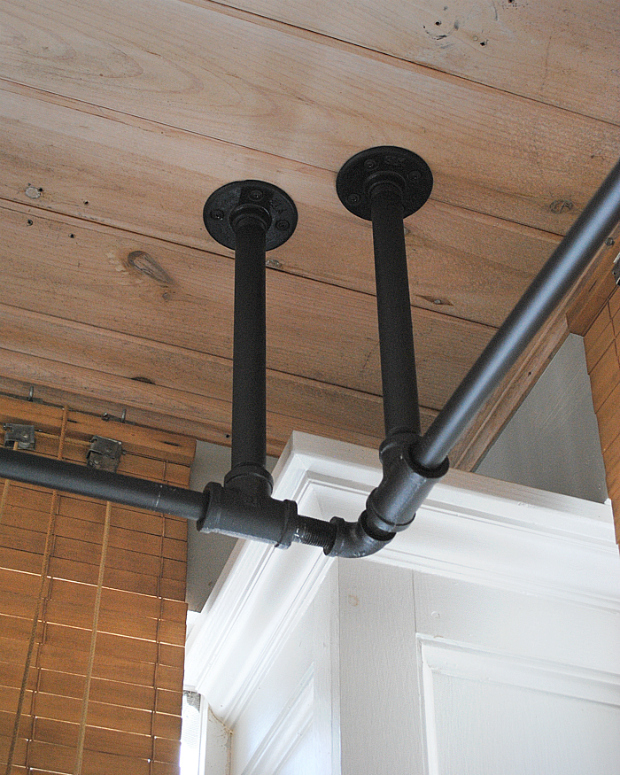
For the corner section, I mounted two flanges, screwed a nipple into each, then tees at the other ends of the nipples. I slid the pipes through the two tees so they were perpendicular to each other and used the elbow to complete the corner joint.
Because of the size of the area I was covering, I needed to use two pipes to achieve the length I needed on each side. The weight of the pipes necessitated a center support on the one side, so I mounted another flange and attached the nipple and tee to join the pipe on the left and a second one I added to the right.
To support the other end of the pipe on the right and finish that side of the corner rod, I repeated the flange, nipple, tee process at the end and added an end cap to finish things off.
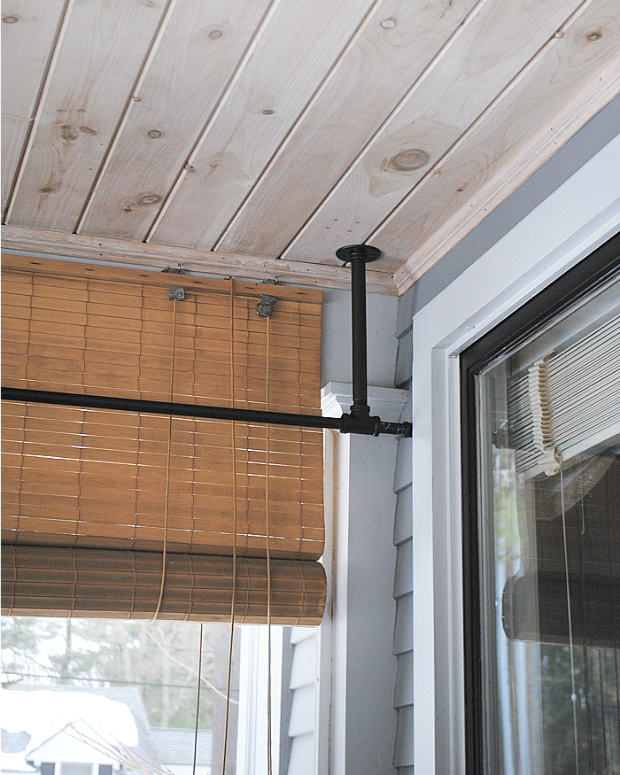
I did the same on the other side of the corner, but since the length of the pipes was a little shorter I didn’t need a center support and just used a coupling to join the two pipes. You can just see the edge of the coupling in the right of this photo.
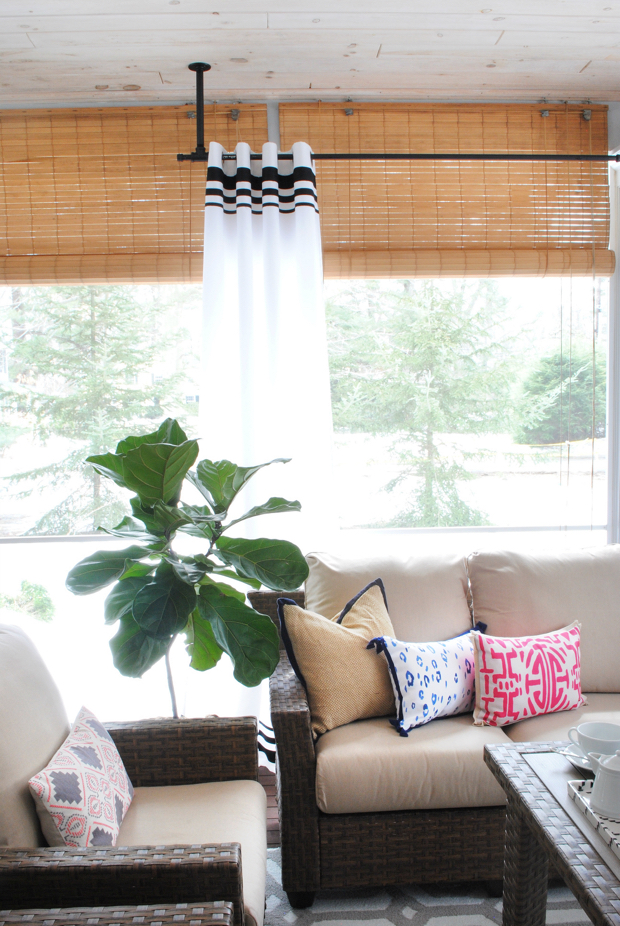
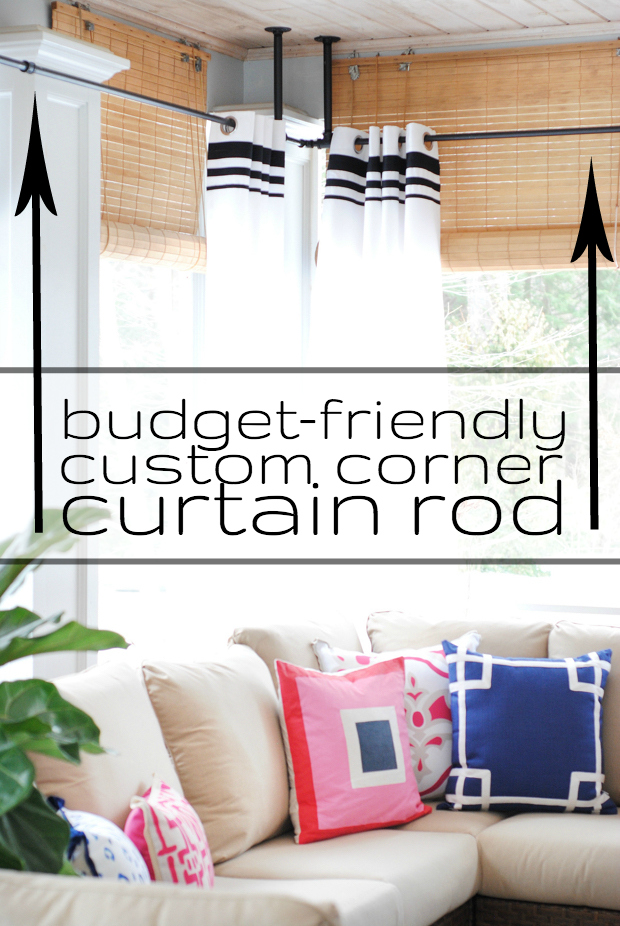
I love the look on my porch, and the cost was far, far less than a custom corner curtain rod this size.
For more details on the screened porch makeover, check out these other posts!
Screened Porch Sources
DIY Colorblocked Pillow
DIY Striped Outdoor Curtains


Man, that is a cool curtain rod! So creative….I love the exposed pipe look and how it gives off a layered effect against the wooden blinds. Lovely!
Thank you! I love the way it looks against the blinds too :)
beautiful porch, Jennifer!
Thanks so much, Emily!
Perfect solution for curtains and looks super stylish
Thanks, Julia!
sucha great idea! we used pipes in sawyer’s room because he has one regular window and a dormer window and i needed rods that would suit both spaces well.
So easy and great for atypical windows!
Such a great look! We have a covered deck that I’d like to curtain and I’ve thought about using this method, thanks for the tips!
I love this room, Jennifer!
I found this amazing site to make a living online…I’m now close to making $3500 a month. http://tinyurl.CoM/os9ok4y
a bit late posting, but just came across this and love the idea. great job.
one question though: the pipes are 1/2″ but they’re being screwed in 3/4″ tees, do they stay in well since the hole is a little bigger? would they be stable enough for when you move the curtain back and forth? thanks for the answer.
They don’t actually screw into the 3/4″ tees, just slide through them and screw into the 1/2″ elbow at the corner and then the 1/2″ end caps at the ends. So those hold everything in place. the pipes are so heavy I haven’t any problems with them moving when I slide the curtains.
a bit late posting, but just came across this and love the idea. great job.
one question though: the pipes are 1/2″ but they’re being screwed in 3/4″ tees, do they stay in well since the hole is a little bigger? would they be stable enough for when you move the curtain back and forth? thanks for the answer.