First, thank you so much for all the nice comments and e-mails after my post last Friday about keeping all the balls in the air. It truly does bring me some calm to know we’re all in the same boat. Some days it feels a little more crushing than others, though, you know?
Today I’m sharing the tutorial for making a windowpane mirror, like the one in my post about the bare wall in my kitchen.

I’ve loved this look for awhile but hadn’t found a reasonably priced ready-made one around, so gathered up some hardware store materials and set out to make one. Here’s how you can too:
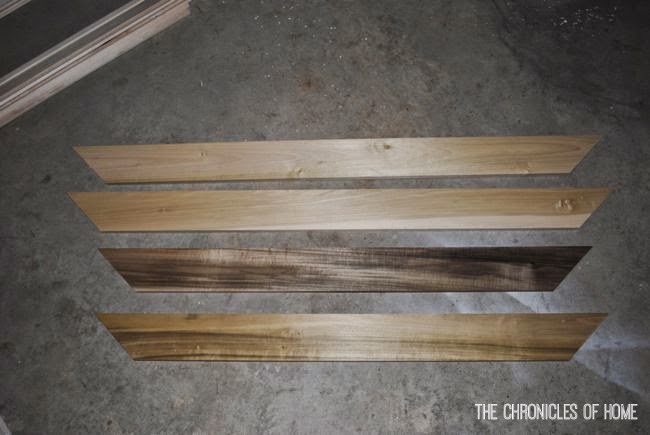
Materials:
- 42″ x 36″ mirror
- 2 – 8′ poplar 1x4s
- 4 – 4′ poplar hobby boards, 3″ wide
- 4 – 4′ poplar hobby boards, 1 1/2″ wide
- 3 – 8′ pieces thin trim moulding (something relatively flat looks best)
- finishing/brad nails – anything less than 3/4″ long
- black semi-gloss paint
- clear adhesive
- hanging hardware – ring hooks and wire
Steps:
Cut the 1x4s with 45º angles at each end – 2@45″ long and 2@39″ long. Measurement are from the LONGER end of the angles, not the shorter.
Lay the boards on the floor to make a rectangle.
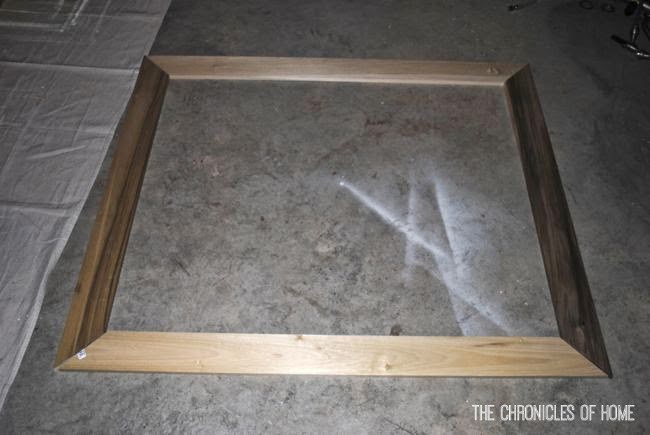
Align one of the 4′, 3″ poplar boards across the top and nail into place, making sure the edges align. Then repeat along the bottom Wouldn’t you know I don’t have a picture of this step?! Just ask if this isn’t clear.
Cut the remaining 3″ poplar boards into two 32″ pieces with straight edges and nail along the sides of the rectangle. These boards are what hold the frame together so make sure you are carefully lining all the pieces up and holding them together while you’re securing the poplar boards. A corner clamp on the 1×4’s helps.
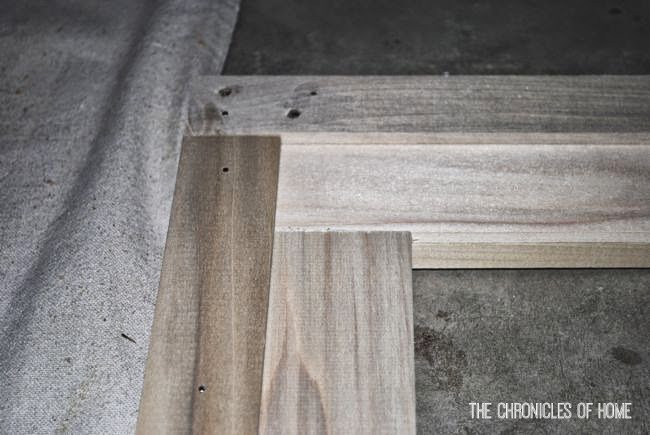
Next, lay two of the 1 1/2″ poplar boards across the top and bottom and nail into place. Then cut the remaining 1 1/2″ poplar boards into two 36″ pieces and nail along the sides. This gives you a lip inside which the mirror will sit.
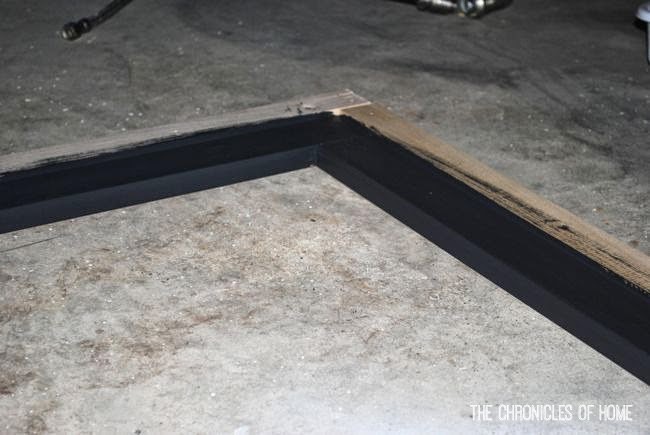
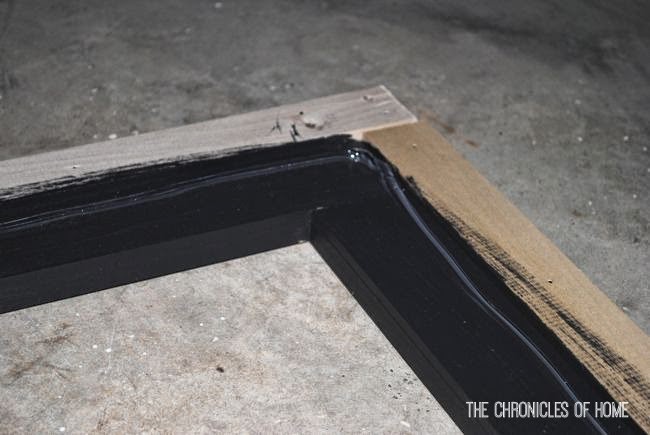
Paint the inside rim black – otherwise the mirror will reflect the bare wood once it’s in place!
Run a thick bead of clear adhesive all along the inside rim then press the mirror into place (back side up).
Let the mirror lay flat and dry overnight.
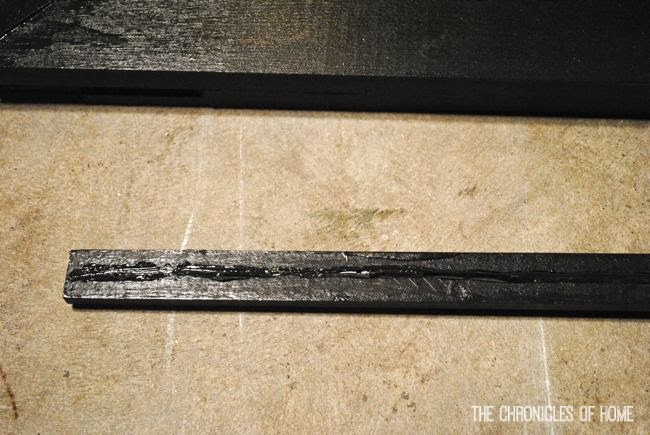
Once it’s dry, paint the rest of the frame and the trim moulding for the “panes” black. Make sure you paint both sides of the trim moulding.
Flip the mirror right side up and mark the center points along each side. Measure the distance from point to point and cut your trim moulding with straight edges to this measurement. Run a bead of adhesive along the back and press into place directly on the mirror.
Repeat with two more pieces to form your horizontal panes.
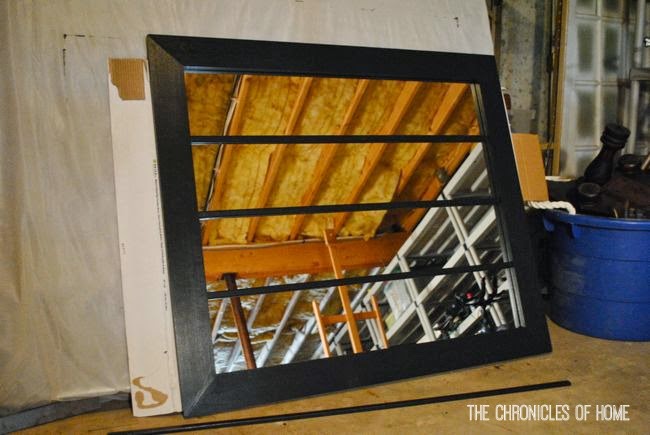
Next mark the center points across the top and bottom. Measure each section and cut trim moulding to fit, then apply adhesive and press into place. You want the most snug fit possible here.
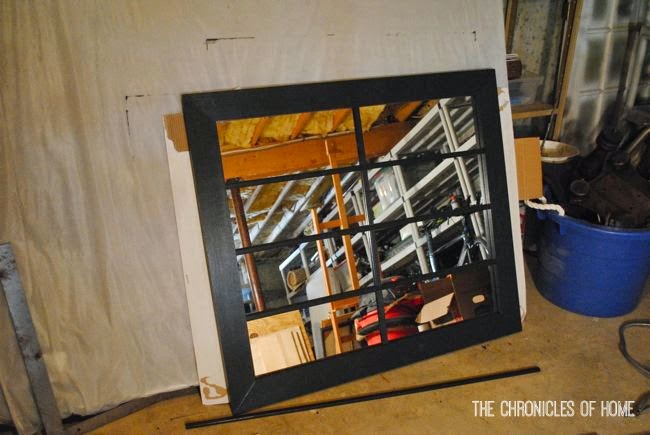
Repeat on either side of the center section to complete the panes.
To hang, screw ring hooks into the back on either side, so the tops of the hooks are about 9″ from the top of the mirror. Attach hanging wire from hook to hook.
The finished mirror will be heavy so make sure you use an appropriate picture hanging hook when you go to hang it on the wall!

You can see the console table makeover here!


This is great!!! I love the scale of it! I recently got a few mirrors cut at a glass shop an it was surprisingly affordable for a custom size!
I need to find a local glass shop – a friend suggested that to me recently and I had an “OF COURSE!” moment!
Lowes sells both glass and mirror up to 30 x 36 inches in size ($16 for the largest size). And if you buy it from them they will cut it to whatever size you want for free!
You did great Jen! You make it look easy! xo Kristin
Well it’s no bar cabinet as far as labor goes ;)
EASY/PEEZY :) This goes directly to MC!
You betcha!!
Awesome! I seriously love how this turned out!
Thanks, Ashley!
you rock! girls who can build awesome things rule.
Seriously, I need to get that on a t-shirt!
Dang, you’re good. Love when a DIY looks so expensive – this one rocks!
Awesome – thank you!!
It looks so good and so high end!
That’s so nice, Bethany – thank you!!
Pinned because I love it
Haha – thank you, sweet friend!
You are the master carpenter! Love this little spot in your kitchen!
Haha! Thank you on both counts :)
Looks so great! x
Thanks, Danielle!
This turned out amazingly! I recently did a tutorial on making one of these beauties out of an old window pane. I am SO impressed you created it from scratch! Great work!:-)
Thank you! I’d been looking around for an old pane to use but hadn’t seen any the size I wanted. The things that are borne of “necessity”… :)
So curious what paint color that is on the walls! Looks great :)
Hi! It’s Benjamin Moore Edgecomb Gray.
Love this! Quick question on the vertical molding. It looks to sit on top of the horizontal molding – what did you do to ensure it stayed in place given it doesn’t have as much surface area to adhere to?
Hi Maureen – it actually doesn’t sit on top of the horizontal pieces. The horizontal pieces run the full width of the mirror, glued to the mirror surface with clear adhesive. The vertical pieces are cut to fit in between each horizontal piece, and are also glued to the surface of the mirror. Hope this helps!
I feel really silly. I am planning to make this, but I can’t understand how it goes together. I think it’s because I don’t have a visual of how the 3″ boards attach. I’m imagining it would cause about a 1″ gap between the mirror and the frame. I’d really appreciate advice/clarification. Thank you :)