
If it is possible to be truly, madly, and deeply in love with a piece of furniture, then lovebugs, I’m here to tell you that I have met my soulmate and we’re running away together.
I spotted this cane chair while thrifting a couple months ago and despite its shoddy appearance I was immediately drawn to it.
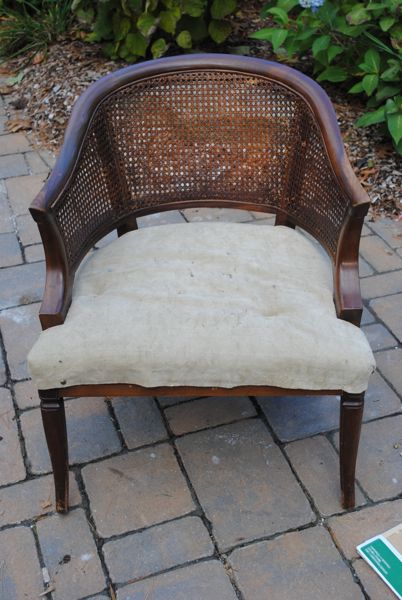
The biggest score and the reason I brought it home was that the caning was almost perfectly intact. There were a few small tears but nothing very major or noticeable other than the finish having worn off.
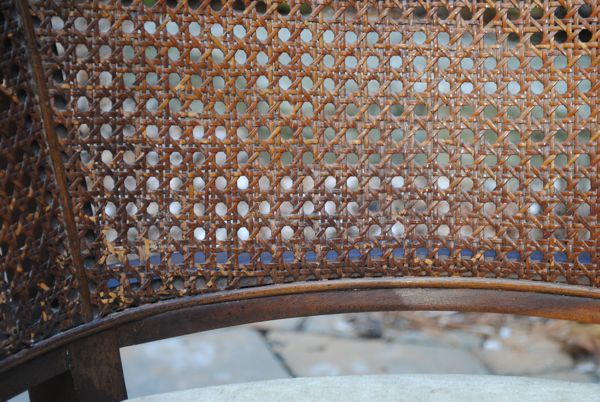
I sanded down the wood by hand, and only to rough it up and get the shine off the original finish. I did not sand any part of the caning.
Then I started ripping off the oddly attached, stained velour cover, which gave off the distinct smell of wet dog.
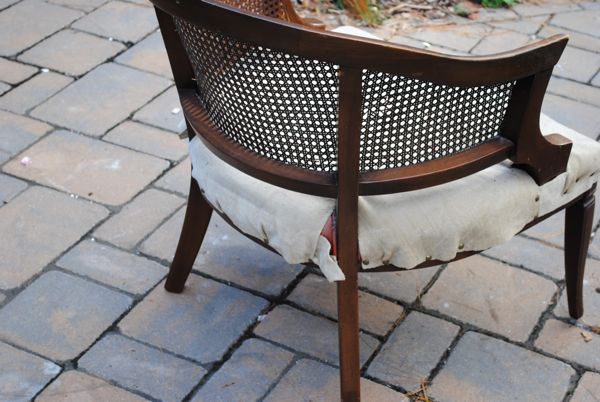
Underneath the velour I found the sorry remains of the original silk upholstery.
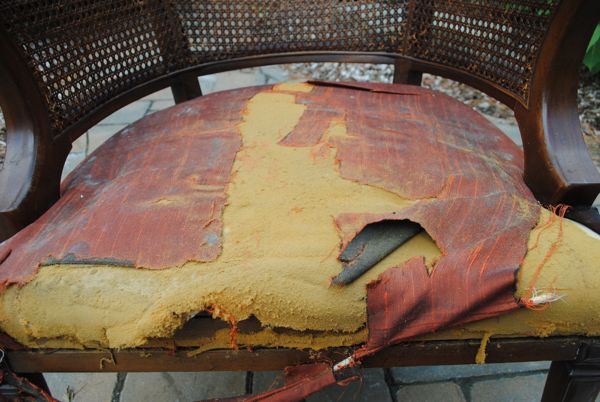
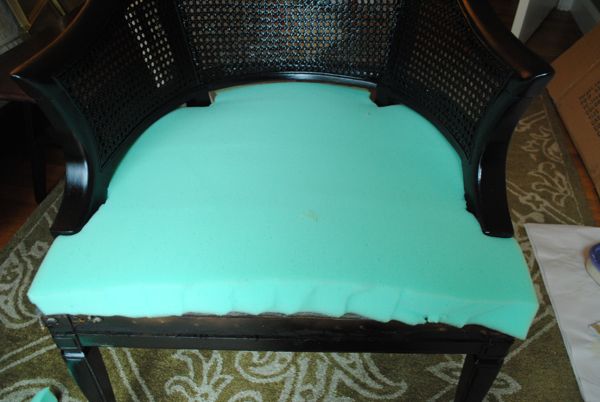
I had been hoping I’d be able to reuse the foam and wrapping but it was turning to dust so I removed it all, down to the burlap and springs, and decided to start the upholstery job from scratch.
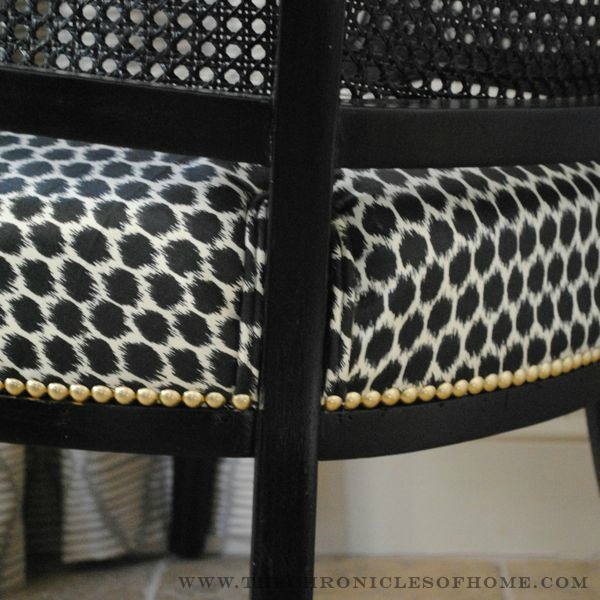
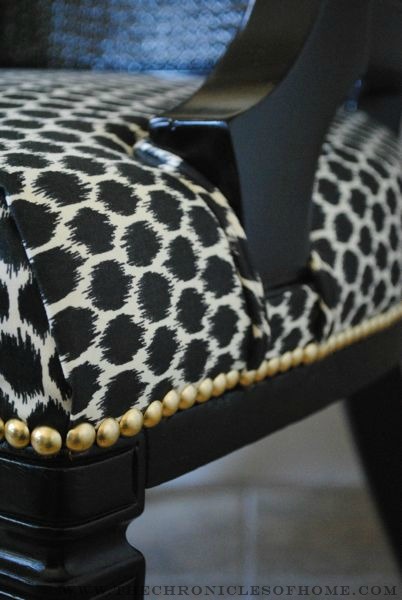
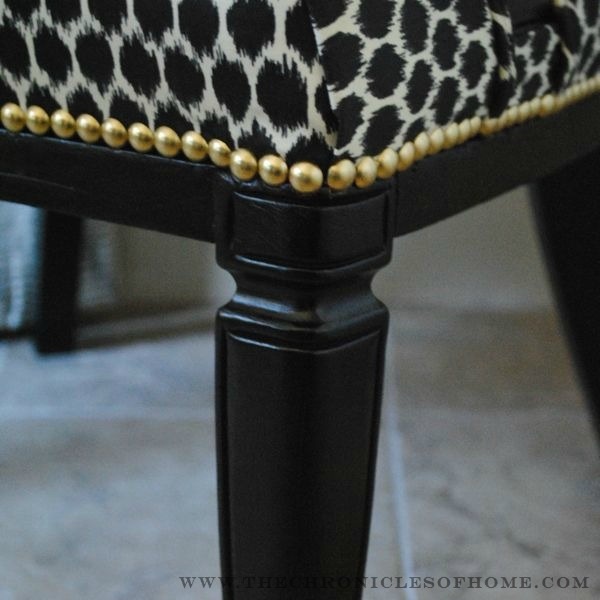
At this point I gave the chair two careful coats of Rustoleum semi-gloss spray paint in black. Hand brushing black paint may have worked too but I was worried about how it would go on the caned parts and the spray paint worked beautifully.
At about this point I realized that I was falling in love and my original plans to sell this finished chair quickly started to slip away. I mean when you know, you know. You know?
I cut 2″ thick foam to fit the shape of the seat as best I could and lay it in place.
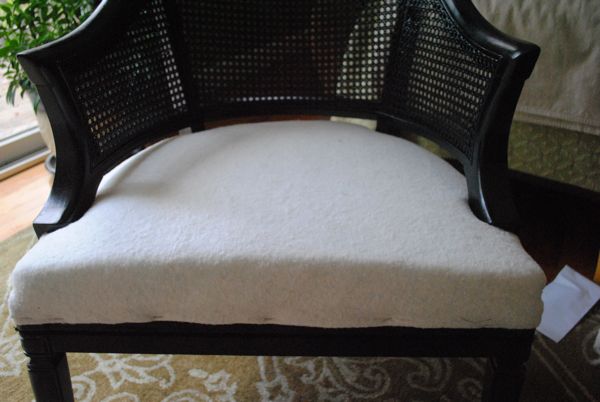
Then I wrapped batting snugly around the foam and stapled it to the frame.
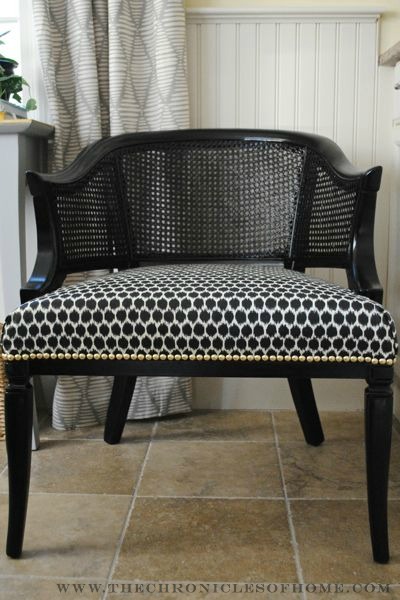
…the traditional carved legs…
…the inviting round curve of the back.
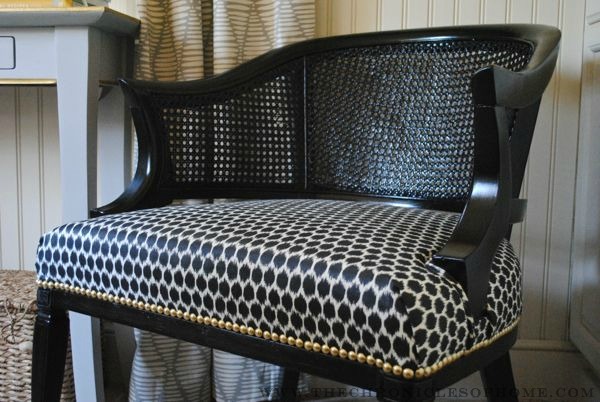
This chair will be moving into our upstairs hallway next to a vintage/antique (I don’t know the difference!) beadboard bookshelf that is next up for a paint makeover. As soon as I have the bookshelf finished I’ll share photos of the chair and shelf together.
But for now, here’s a straight on shot of my love.
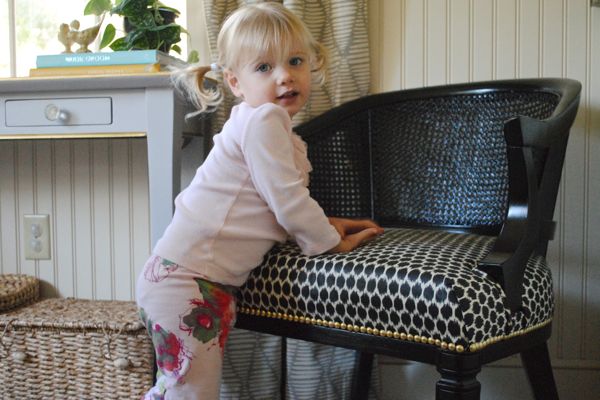
And another one of my cute model :)


WOW, jennifer! it is stunning!!!!! fabulous makeover! and your little girl is precious- i miss those little pigtails.
I absolutely love this makeover – my mother has a cane chair that has hideous orange tufted grossness on the bottom, so now I’m thinking of absconding with the chair… Do you know any tricks for repairing caning? I think it’s in good condition… hmmm… :)
Eeee…repairing caning intimidates me. I’ve gotten supplies online at Basket Makers before but not for caning repair. Sounds like it’s a worth a shot though, I love cane chairs, and if you can one for free…well, why not go for it?!
LOVE the glossy black, and the fabric looks fabulous here too! Glad that you are keeping it :)
I love this! I have a very similar unfinished chair that stole my heart sitting in my garage, waiting to be made over, and your makeover has inspired me to tackle it soon. Gorgeous!
Oh good! Good luck, it was so rewarding to see it all come together. Hope yours is too!
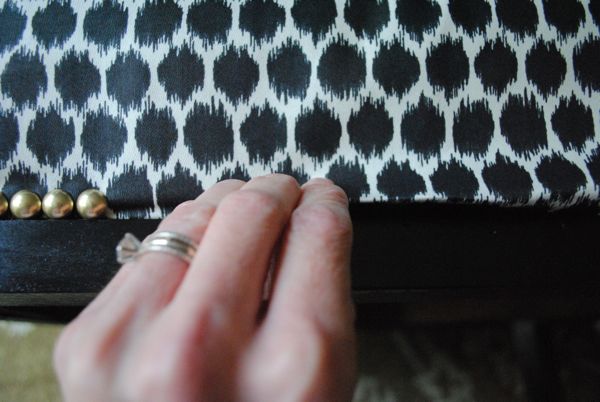
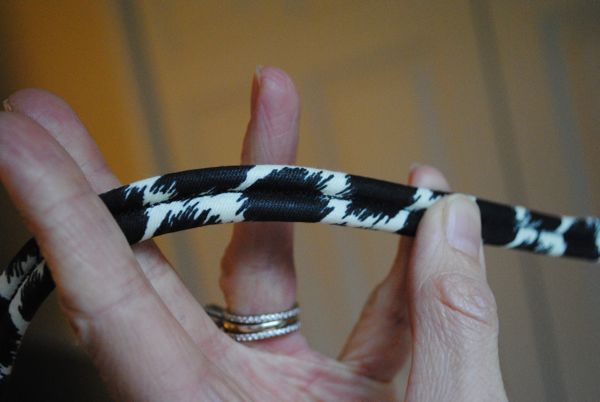
Wow, that came out looking fantastic! I see why you want to keep it. I recently redid a cane-back chair, but didn’t do welting or nailheads….love both on your chair.
Thanks so much! I love all those finish details with upholstery. There’s some finesse to them but I was surprised how much easier they are to do than what I expected before trying.
You can defiantly stitch up a chair! Awesome work.
Oops I mean definitely!
I can be defiant too :)
Wow, wow and wow. How in the world…..? Give me some wood and power tools, and I’m good…but this is like, beyond me! LOL
I so want to try this. I’m not a seamstress. At all. I can sew on a button. Does that qualify? Seriously, I love this chair. You make me want
to try one. Dont know a thing about welting. Wouldn’t even know where to start. Love the nailheads. How did you get the fabric so neat and tight.?? sigh……
It looks amazing! Fantastic job (ss always!). Love love love the fabric! :)
Love it! The piece is perfectly updated. I did some similar shaped chairs this week, too.
Gorgeous update! You did such a great job choosing paint, fabric and the nail heads!
Very impressive! The black paint, fabric and nailhead trim all looks fabulous together. And congrats on the welting!!
I would like to paint my caned dining room chairs. How has your chair held up over the last few years. Has the paint continued to adhere to the caning?
Hi Sheila,
It has held up really well, no visible chips or cracking but it’s not heavily used, so I’m not sure if you would have the same results for a chair that saw lots of use. Spray paints are usually oil-based though, which are known to be very durable.
Thanks for responding!! I’m going to go-for-it.